
Virgo Galaxies around M86

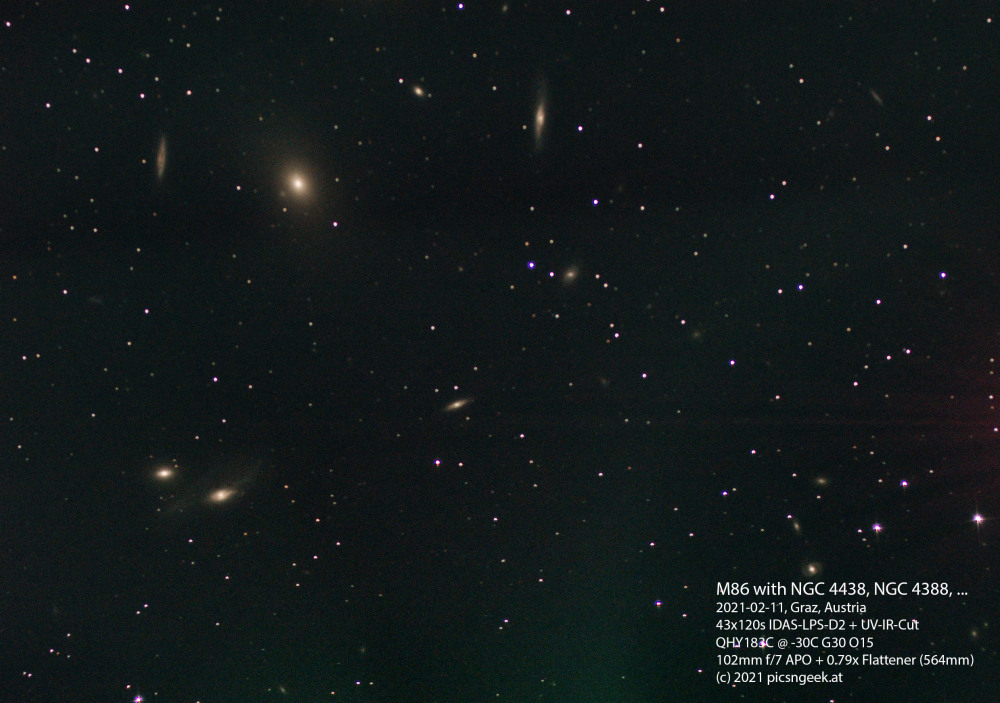
This is the next image captured last weekend. I recorded 114 individual exposures of 120s, from which I could use 43 due to clouds crossing in the night.
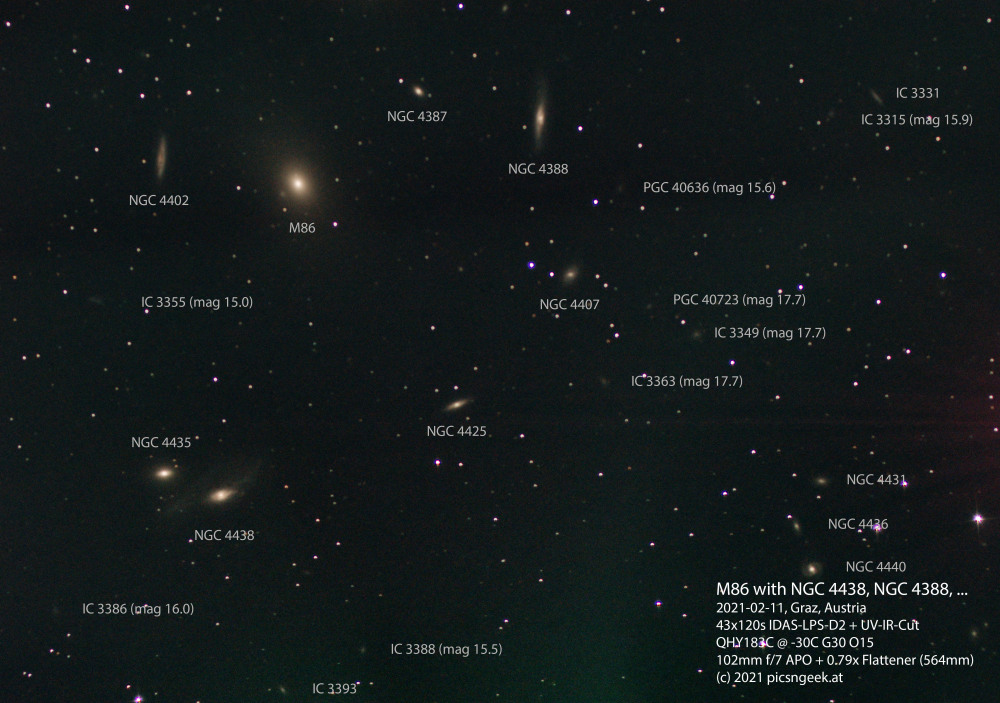
I annotated the image with the galaxies visible. Among them are:
M86 (mag 8.8)
NGC 4438 (mag 10.0)
NGC 4388 (mag 10.9)
NGC 4440 (mag 11.8)
NGC 4402 (mag 11.9)
and the faintest ones visible are
IC 3386 (mag 16.0)
IC 3349 (mag 17.7)
IC 3363 (mag 17.7)
PGC 40723 (mag 17.7)

Image data:
Date: 2021-02-11
Location: Graz, Austria
Telescope: 102mm f/7 APO with 0.79x flattener (equals to 564mm focal length)
Camera: QHY183C @ -30C
Filters: Baader UV-IR Cut + IDAS LPS-D2
Guiding: MGEN-II with off-axis guider
Exposures: 43x100s RGB

Leo Triplet with H-alpha and O-iii enhanced

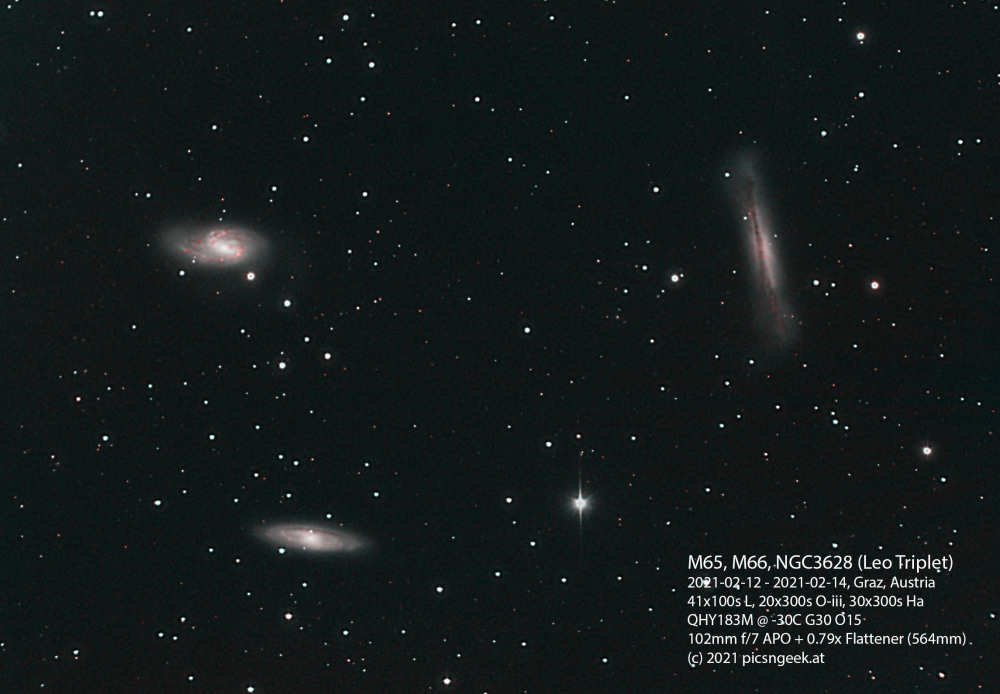
During the last few days there were really promising clear nights. I recorded several data sets from my urban location (under these conditions, going up the mountains would have been a treat!). Now, as there are clouds again, I am processing the captured data. Here is the first result from the Leo Triplet (M65, M66 and NGC 3628).
I still have not yet received my color filters. So here I have a combination of luminance (UV-IR-Cut), H-alpha and O-iii data.

Image data:
Date: 2021-02-12 – 2021-02-14
Location: Graz, Austria
Telescope: 102mm f/7 APO with 0.79x flattener (equals to 564mm focal length)
Camera: QHY183M @ -30C
Filters: Baader UV-IR Cut + IDAS LPS-D2, narrow band Ha, Oiii
Guiding: MGEN-II with off-axis guider
Exposures: 41x100s Luminance, 20x300s O-iii (2x binning), 30x300s H-alpha (2x binning)
Sky-Quality: 19.4-19.6 mpss

M42 (Orion nebula) in narrow band – Hubble palette

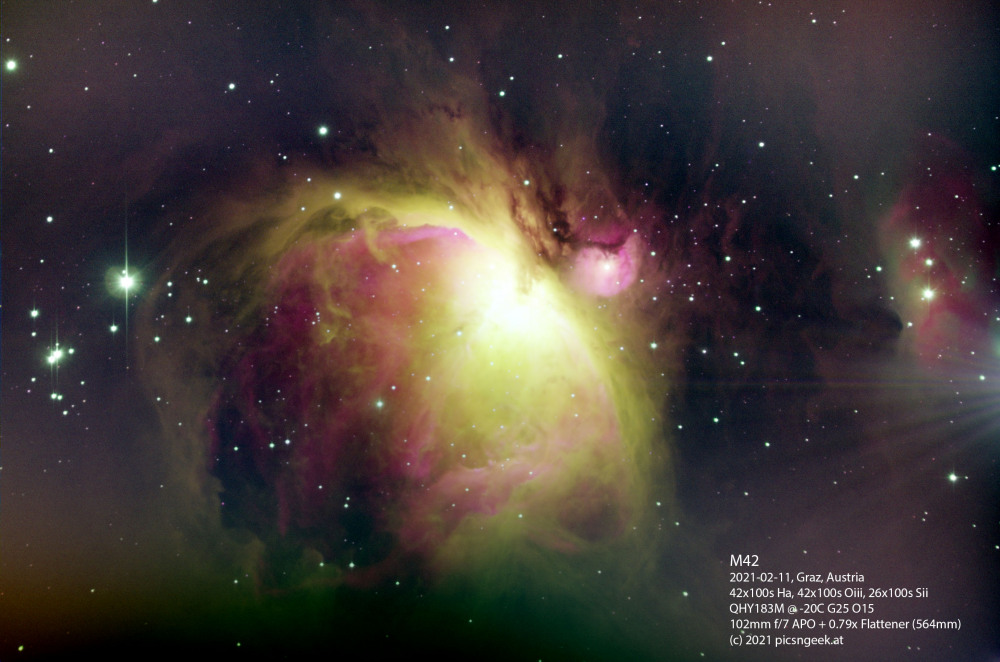
Finally, the clouds did break! After more than 2 months, this is the first chance to do some astro photography. It would have been a great opportunity to go up on one of my mountain observing spots. But with clear skies and a northern wind, temperatures dropped to -10C and below. So I stayed in the comfy warmth of home with urban light. Even though, narrow band images are still possible with quite long exposure times.

With the great Orion nebula, imaging is not too hard to accomplish, as the nebula is really bright. So a set of 110 exposures of 100s revealed the following image. Unfortunately, I could not completely remove the amp-noise from the camera as well as the uneven background. I have to improve my skills in post processing 😉

Image data:
Date: 2021-02-11
Location: Graz, Austria
Telescope: 102mm f/7 APO with 0.79x flattener (equals to 564mm focal length)
Camera: QHY183M @ -20C
Filters: Baader narrow band Ha, Oiii, Sii
Guiding: MGEN-II with off-axis guider
Exposures: 42x100s H-alpha, 42x100s O-iii, 26x100s S-ii

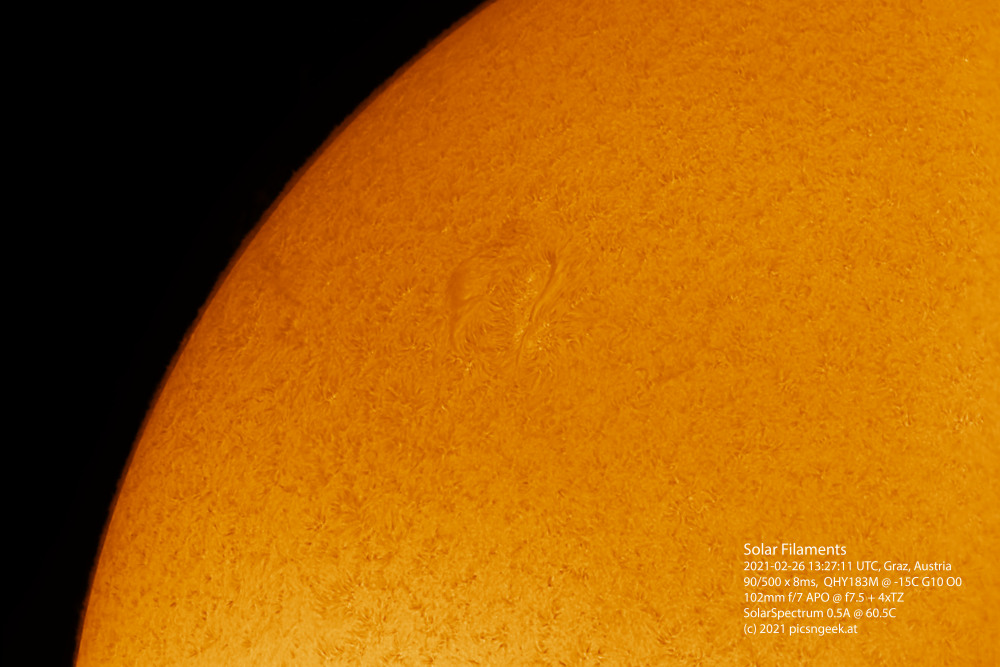
Effect of temperature tuning a Fabry-Perot Etalon solar H-alpha filter

Since the first days I could observe the sun through a narrow band solar H-alpha filter, I was wondering what the tuning effect of such a filter would be. It does not matter whether the filter is pressure, tilt or temperature tuned. The effect of slightly shifting the filter central line is the same. With the temperature tuned filter, I have at hands, a comparable test series is easy to achieve.

I know from previous observations that the filter performs best at 58.0C. Therefore I set the test points at 5 degrees steps across the range of possible temperatures. Only close to the 58C I added 2.5C halve interval steps.
Each individual image was recorded with a set of 100 frames, from which the 20 best frames were stacked. At each temperature I recorded 2 sets at different exposure settings: one for the surface (granulation, … – unfortunately no sunspots were active) and the other for prominences (only minor activity here as well).

As is obvious from the result, the low temperature settings yield close to no interesting view. Between 55.5C and 63.0C the filter delivers good contrast. Beginning at 63.0C contrast degrades again.

Imaging setup:
Telescope: 102mm refractor
Camera: QHY183M @ -20C
Filter: Solar Spectrum – Solar Observer Series 1.5, 0.5A solar H-alpha filter

Viennese rolls (Handsemmeln) made at home

Baking at home is a regular task for me. I enjoy having a fresh, crunchy and lovely tasting loaf of bread and the house full of this bakery smell 🙂 I am quite confident and pleased with the bread I bake. But when it comes to Handsemmeln, I struggle.

It is common saying, that one needs to fold 10000 Handsemmeln to get them symmetrical and right. OK. I accept that my rolls wont be perfectly shaped (though they look quite nice to me) for the next century ;-). What bothers me is, that my rolls won’t end up with sufficient volume. Compared to the wonderful fluffy inside and hard crust outside rolls from local bakeries, my rolls fall really short at 60% volume and a crust, by far not so crunchy and hard.

Perhaps I am lucky and an experienced baker reads these lines. I would really appreciate comments here!

Happy New Year (light painting in the starry night)

Light painting is a fascinating way to communicate a message. If the background and light is right, it is only up to your imagination what you add to your photo…

Here is how to create a light painting (how I created this New Years greeting):

  • Find the right scene:
    you need sufficient space to move
    you need a sufficiently dark background to “write on”
  • Set up your camera on a tripod
  • use a wide-angle lens. With a tele lens you have to stand quite far away from the camera
  • use a timer remote or have a friend operate the camera. Otherwise you will have a workout running back and forth 😉
  • prepare a flashlight, which is not too strong. A red or otherwise colored flashlight creates beautiful effects! You may cover your white light with colored filter foil as well!
  • wear dark, non reflecting clothes! Or you will appear like a ghost beneath the text in the image
  • try to memorize, which message you want to write
  • find the right spot where you will write, so that the text is at the right location in your image (take test shots to verify!)
  • find the right size to write your letters. The text has to be readable and within the bounds of your scene or camera frame
  • determine, wheter you will write in single strokes, or multiple strokes. This depends on the intensity of your flashlight and the desired effect, how the letters should look like. Single strokes look quite clean, whereas multiple strokes create a bit fuzzy look, which is often more appealing. Though multiple strokes are more difficult to make, as you write in thin air and have no reference, where you put the previous line.
    Therefore keep in mind: you only move your hand when writing one letter. Move your body only when advancing to the next letter or word!
  • test, how long you need for the message to write. This defines the minimum exposure length!
  • Set the right ISO value and aperture for the desired exposure time. Test the exposure to not over-expose. If you choose a too low ISO / too high aperture, you dim the flashlight. This makes the text you write hard to read
  • Now for the tricky part:
    The text you will write has to be written mirrored! It is the camera who “wants to read” the message, not you!
    Memorize your message in mirrored letters, written from right to left. It helps to close your eyes and just move your hand writing the mirrored text a couple times. Don’t get too frustrated when you make errors! Depending on the letters, I need several attemts to have everything right as well 😉
  • Now you are all set. Get in position, switch on your flashlight. Trigger your camera and start writing!
  • Tips:
    – cover the flashlight with your hand when advancing to the next letter / word!
    – move brisk but fluently
    – direct the flashlight to the camera
    – make equally spaced steps between the letters or words

Jupiter & Saturn conjunction (handheld with smartphone and pocket telescope)

Winter has just begun and the days as well as nights are already annoyingly full of clouds or high layers of fog. So there is no way to see stars or planets for days or weeks. This situation is especially annoying, if there is a special celestial event like the greatest conjunction of Jupiter and Saturn in years. Jupiter and Saturn were a mere 6 arc-minutes apart from each other on December 21.

On December 26 I did not expect anything better when beeing out a bit. Though this evening, clouds opened up for a couple of minutes to show Jupiter and Saturn very low above the horizon. Jupiter and Saturn had a angular separation of 33.5 arc-minutes.

I had my smartphone and a 50mm pocket telescope with 15-45x magnification at hand. Not much for high-res images. Even worse, I did not have a tripod or anything else to stabilize the hand held setup. Though I could capture the moment. And judging the shaky hand-held setup (telescope in one hand, leaning against a wall, smartphone in the other), it is really beautiful! Fortunately, I captured a burst of 40 frames, so that I could reduce noise significantly (see the raw and processed image below).
For this kind of setup I am really amazed, that the four big Jovian moons as well as a 7.78mag Star can be discerned (see labelled image)!

Acquisition details:
Telescope: no-name 50mm, 15x-45x extendable pocket telescope
Camera: Huawei P30 lite
Location: Graz, Austria
Time: 2020-12-26 16:12 UTC
40 frames (burst capture), manually aligned and stacked in Photoshop (neither PixInsight, Deep-Sky-Stacker nor AutoStakkert were able to align!)

Sunspots 12785, 12786, 12788 from 2020-11-29

The prolongued quiet phase of the transition from solar cycle 24 to 25 hasn’t have much to show off. But now, the sun has several sunspots as well as prominences to marvel on!
It is really fascinating, that the sun burst into activity within only a few days.

I was lucky to get a brief period of cloud free late morning to image the sunspots 12785 (the spot to the right), 12786 (the large whale-shaped spot to the right, including the tiny spots left to it) and 12788 (the group of tiny spots to the south-east of 12786) in a 2-tile mosaic.
On the limb, there is quite some activity too! See the 2 parts with prominences here:

Prominence timelapse from 2020-11-22

On November 22 on the south-eastern limb of the sun, a stable prominence was visible. The prominence seems to consist of three different prominences (one flame type, one fan type and one arch type). They all seem to origin from sunspots 12785 and 12786. Whereas I assume, that the arch type prominence to the right is most likely from 12786.

The timelapse shows the activity of the prominences from 09:45-12:30 UTC. The clip has 342 individual images. Each image was stacked from 12 frames out of bursts of 300 frames. Post processing and colorization in PixInsight.

These 2 images from beginning and end of sequence show the beautiful structur as well as the changes within.

This site uses cookies. By continuing to use the site (including navigation and scrolling), you agree to the use of cookies. more information

The cookie settings on this website are set to "allow cookies" to give you the best browsing experience possible. If you continue to use this website without changing your cookie settings or you click "Accept" below then you are consenting to this.

Close