With the sun in solar maximum 2024 had several fascinating aurora events even far from the aurora oval at around 66 degrees latitude. Therefore I planned for a trip to Iceland, to see aurora in its best. Who could expect the sun to take a pause, so no significant eruption takes place from the first days of 2025 on? Reencouraged with a note from space weather officials, that the setting of interplanetary magnetic field, earths magnetic field and the ring current was favorable to produce aurora at least close to the aurora oval, I travelled to Iceland. Arriving there in anticipation for a pristine northern winter experience had another surprise at hand: a large low pressure zone lured south of Iceland. This low pressure zone caused strong winds (reaching almost 30m/s), lots of rain and unusually high temperatures (up to 9°C) for February.
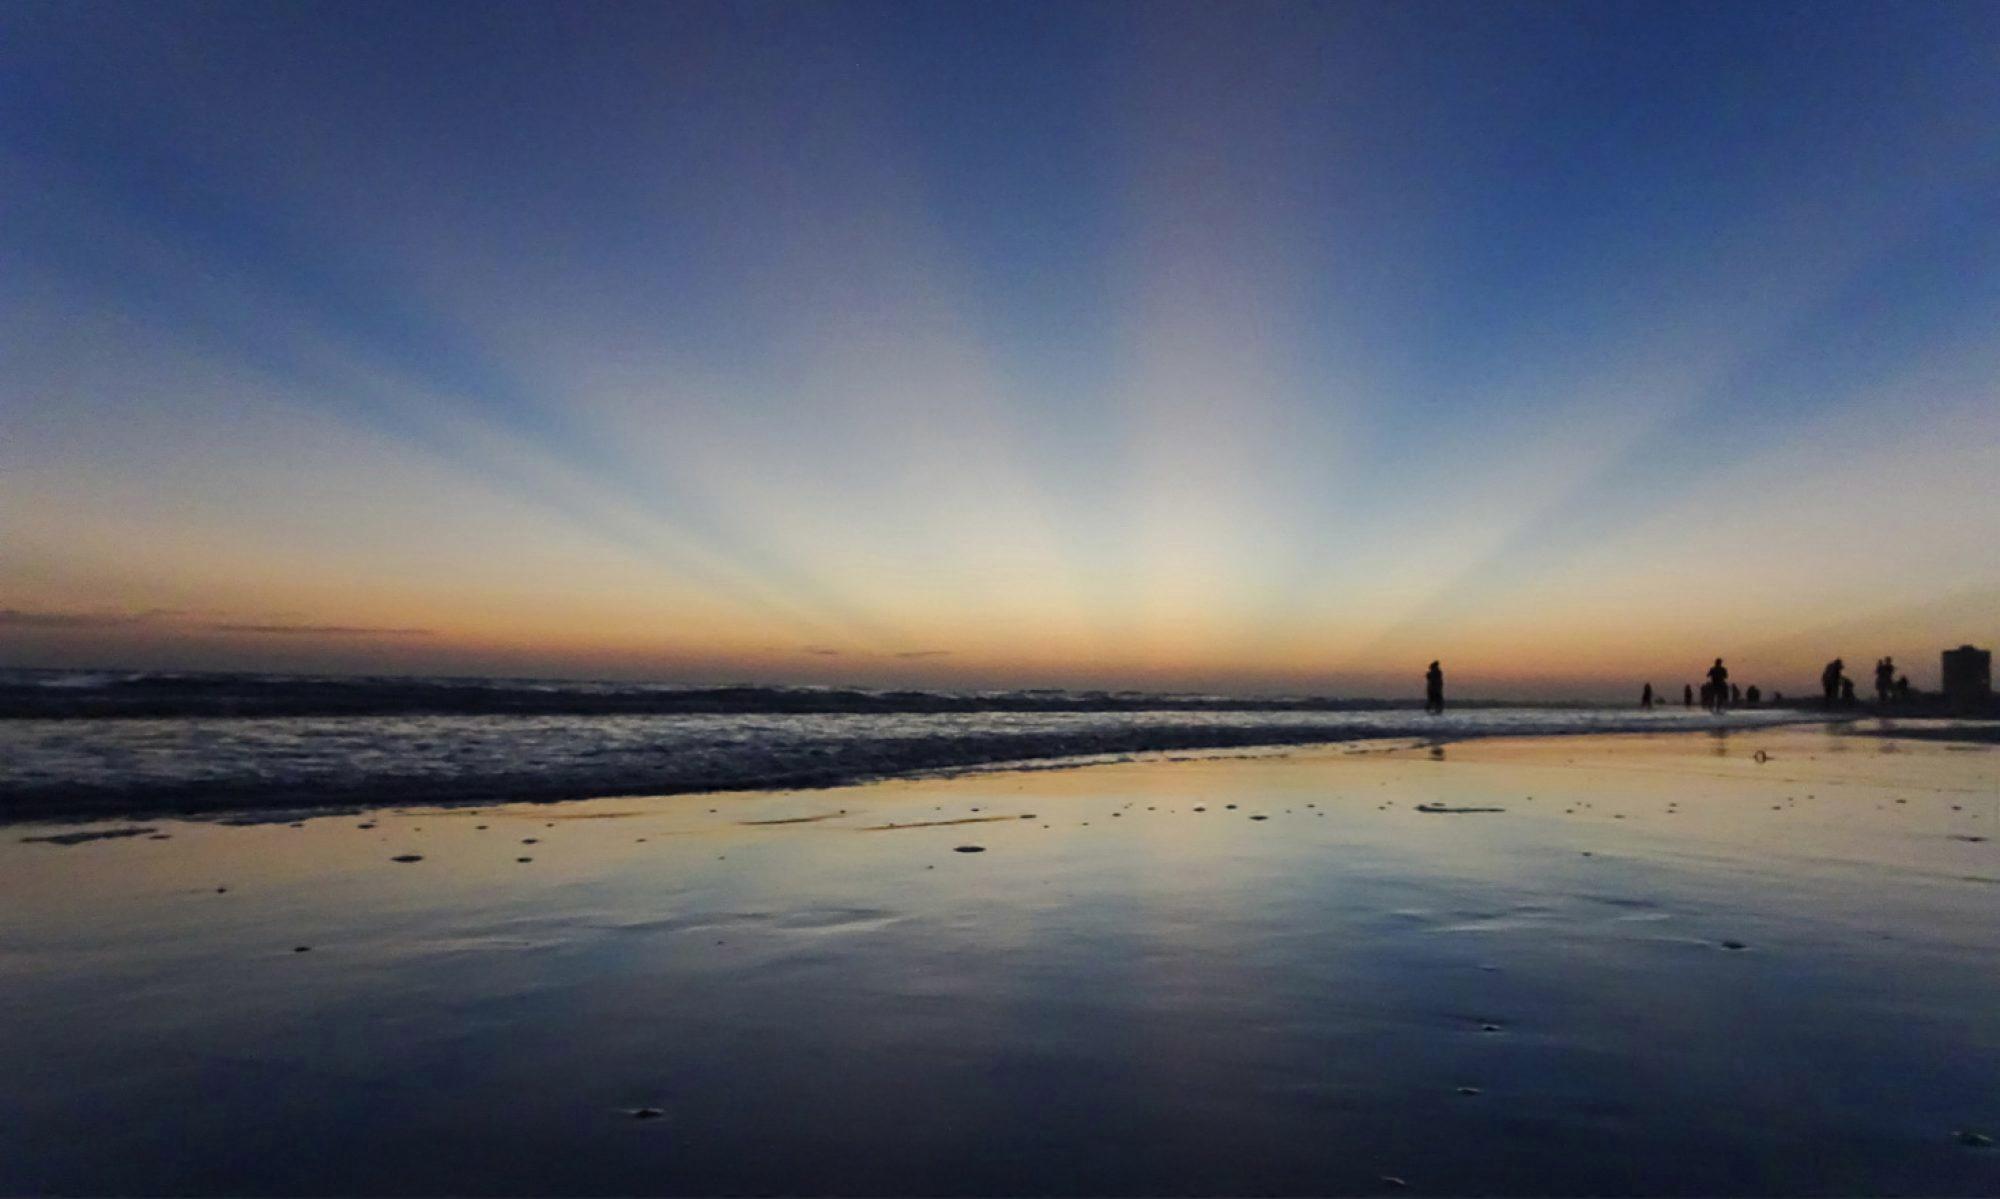
After four days of grey skies and rain, weather was improving a bit. Even a 3-4 hour window of cloudless skies was predicted for the late evening. As if planned, when the clouds subseeded, the aurora began its show. Most of the time, Aurora was like eery greyish cloud bands to the naked eye. But during phases of increased intensity, green and red tones were also clearly visible. On camera, especially the green aurora looks spectacular!
The following day was again quite wet. But at night, once again a few hours with little cloud cover provided another aurora show to be witnessed. To top off the Iceland experience, on the last day a few moments of sunlight during sunset let me part in joy to have seen aurora and the beauty of this island
Recently I visited Helsinki (Finland). Temperatures dropped down to -15°C, causing even the waters in Kruununvuorenselkä to freeze over. Further out, patches of ice foes were drifting. Along with a fresh blanket of snow, everything just looked amazing. Especially Nuuksio national park close to Helsinki provided a marvellous setting for a great time
Finally, the long awaited comet C2023/A3 Tsuchinschan-ATLAS reappeared after its passage close to the sun. With a well timed window between clouds, I could observe and image the comet. From all the announcements, I expected the comet to be brighter. But still, it is a naked eye comet to enjoy with a pretty long tail.
So i started a new imaging run with higher magnification (1320mm instead of 564mm) and more sensitive camera. The resulting image of almost 13 hours data shows a lot more of the surrounding and weak features, even though, the same imaging location was used. The same Bortle 6-7 location was used, observing low above the light cone of the city.
During the last weeks I imaged IC1613, a dwarf galaxy of the local group in constellation Cetus. After stacking the images, I detected an object, which obviousely moved 28 arcsec during the 129 minutes I captured images on November 15th. It seems to be Asteroid (140) Siwa.
On November 04 and 05 a few Coronal Mass Ejections were released from the sun (a coronal hole is facing our direction). Yesterday evening at 17:06 CET the solar storm arrived and created an impressive aurora display. The most fascinating fact is, that conditions were so intense, that even in southern Austria (below 47 degrees North) the sky in northern directions was colored red! It was an amazing visual experience!
The pictures below were captured with my mobile phone. The aurora was so bright, that even handheld images were possible!
On August 12, two successive solar flares erupted from active region AR13395 within 92 minutes. The video begins at the end of the C8.8 eruption, which started at 09:04 UTC. At 2/3rds in the video, the second eruption occurs, which startet at 10:36 and lasted till 10:54.
Last night our astronomy club (www.stav.at) organized a curbside astronomy afternoon and night in Frauental. We had perfect weather conditions to present several celetial wonders to the public. In the afternoon, the sun could be observed in white light and through hydrogen alpha filter. Meanwhile kids could enjoy different activities. When darkness fell, Saturn was obviousely the great “star” to get a lot of a’s and o’s. Several visitors were in disbelief, that a mobile phone would be able to capture a prominence or Saturn / Jupiter. So I shot the 2 images below keeping the visitors baffled. A few tried their own luck by holding their smartphone to the telescope eyepiece. Most of them couldn’t believe, that their *own* phone could do that 🙂
The evening passed by so quickly, but it was a lot of fun and inspiring to talk to all the folks stopping by 🙂
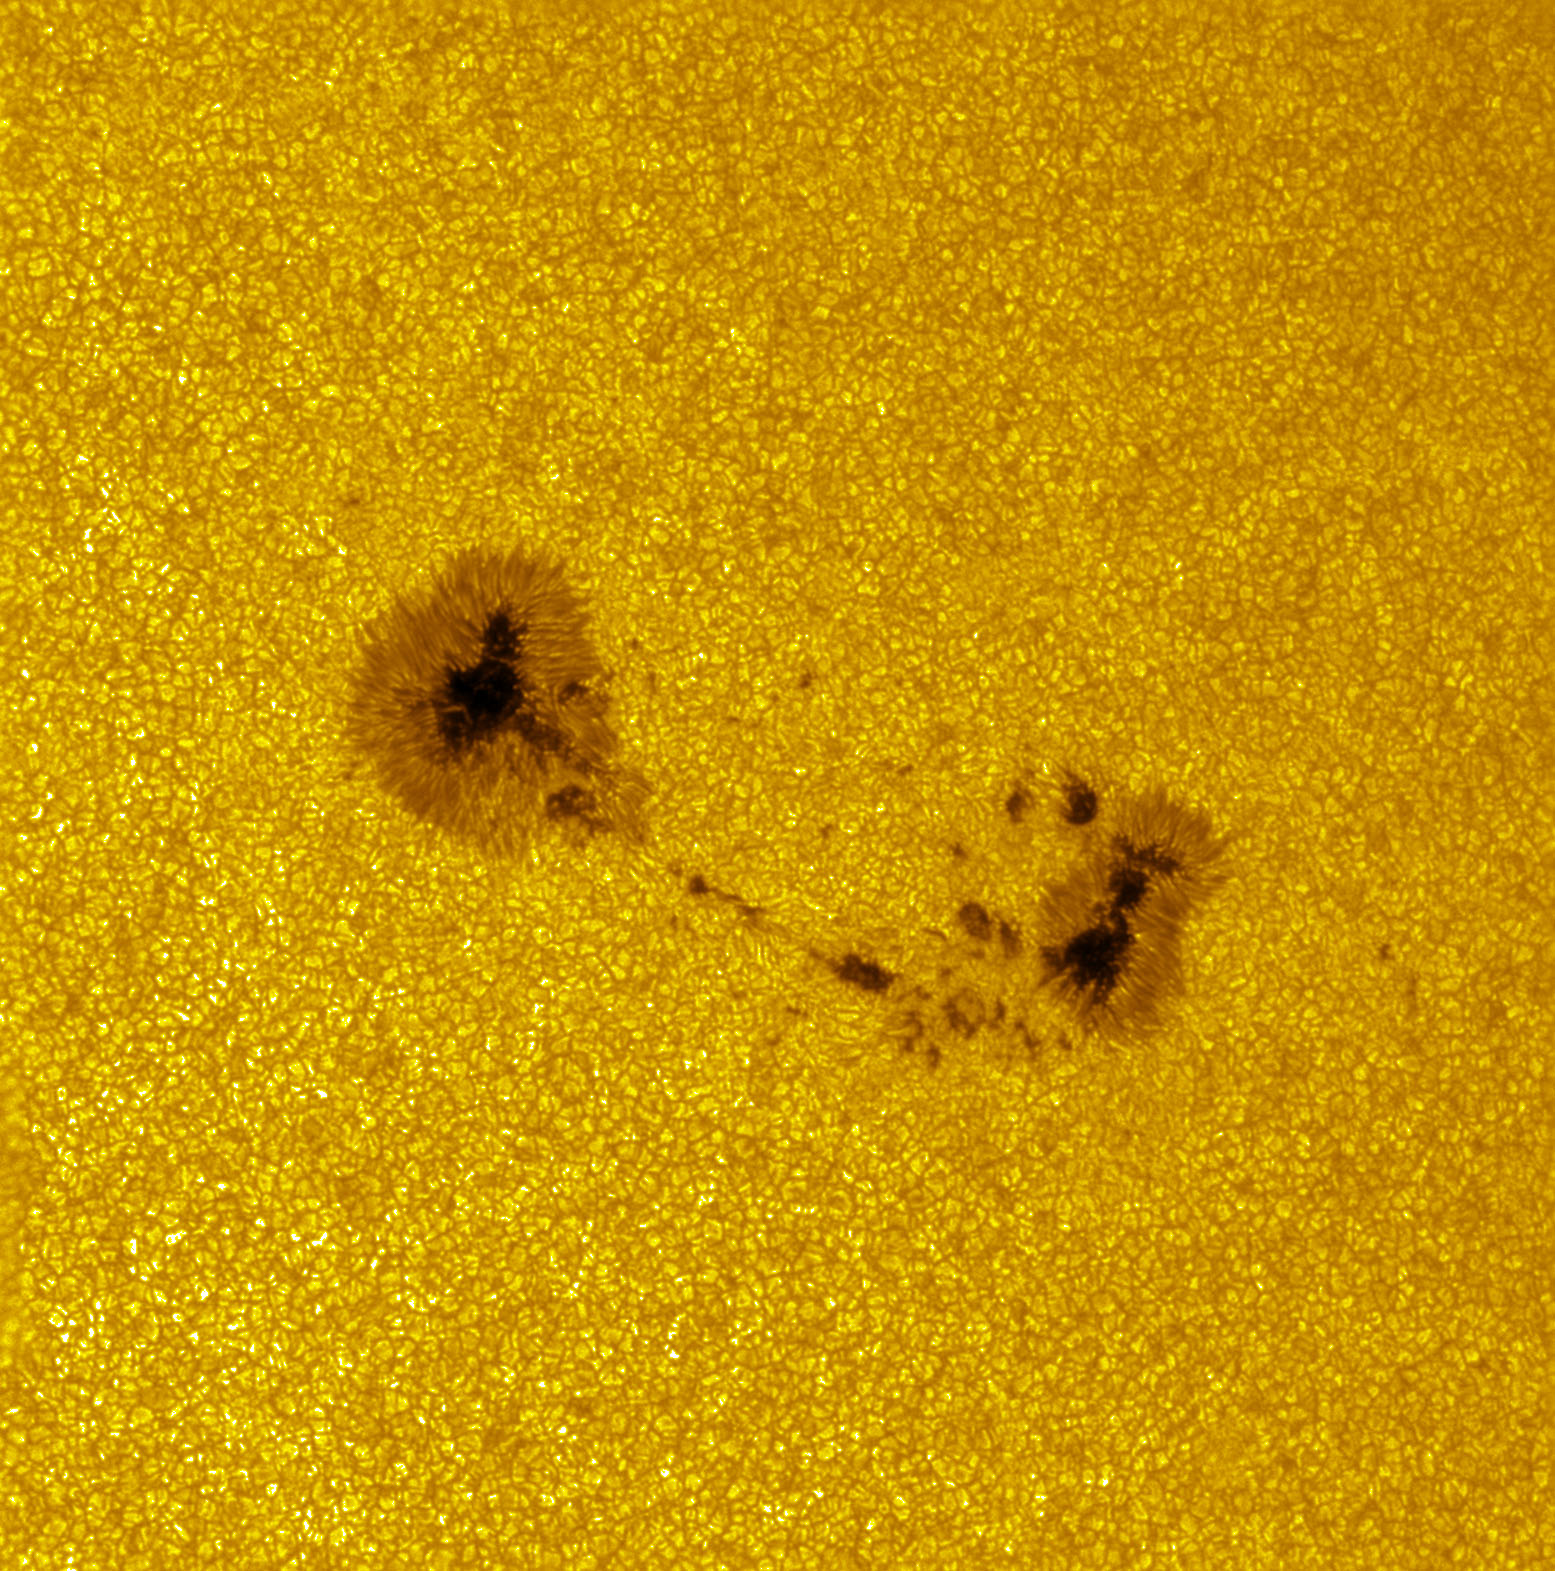
Last week I could participate in a telescope meeting in hungary. Although it was hot and humid, the air was quite stable during the day. So I could capture a timelapse of the beautiful sunspot region 13403 with impressive resolution of 0.158 arcseconds per pixel through my 10″ Newtonian telescope. The high magnification paid off, as I could for the first time capture the fascitating motion of the granulation.
Technical details: Telescope: 10″ f/5 Newton + 2.5x Barlow lens = 3125mm effective focal length Camera: QHY183M (2.4µm pixels) Filters: Baader solar film + Baader solar continuum Sequence: 149x 1000 frames, 30s interval Recording time: 10:26-11:42 UTC
As I am imaging in a rather severe light polluted location, where the landlords have installed significantly stronger light fixtures, I am plagued with strong gradients and a circular pattern in my images. These gradients won’t calibrate out with bias, flat and dark frames. I tried several approaches to get rid of them. I added a dew shield with no significant improvement. I added a light blocking hood to the back of my Newton scope with only marginal changes. I created flat frame images in different combinations (with or without dew shield, high and low exposure target, vertical or angled scope position, …). All with no significant changes.
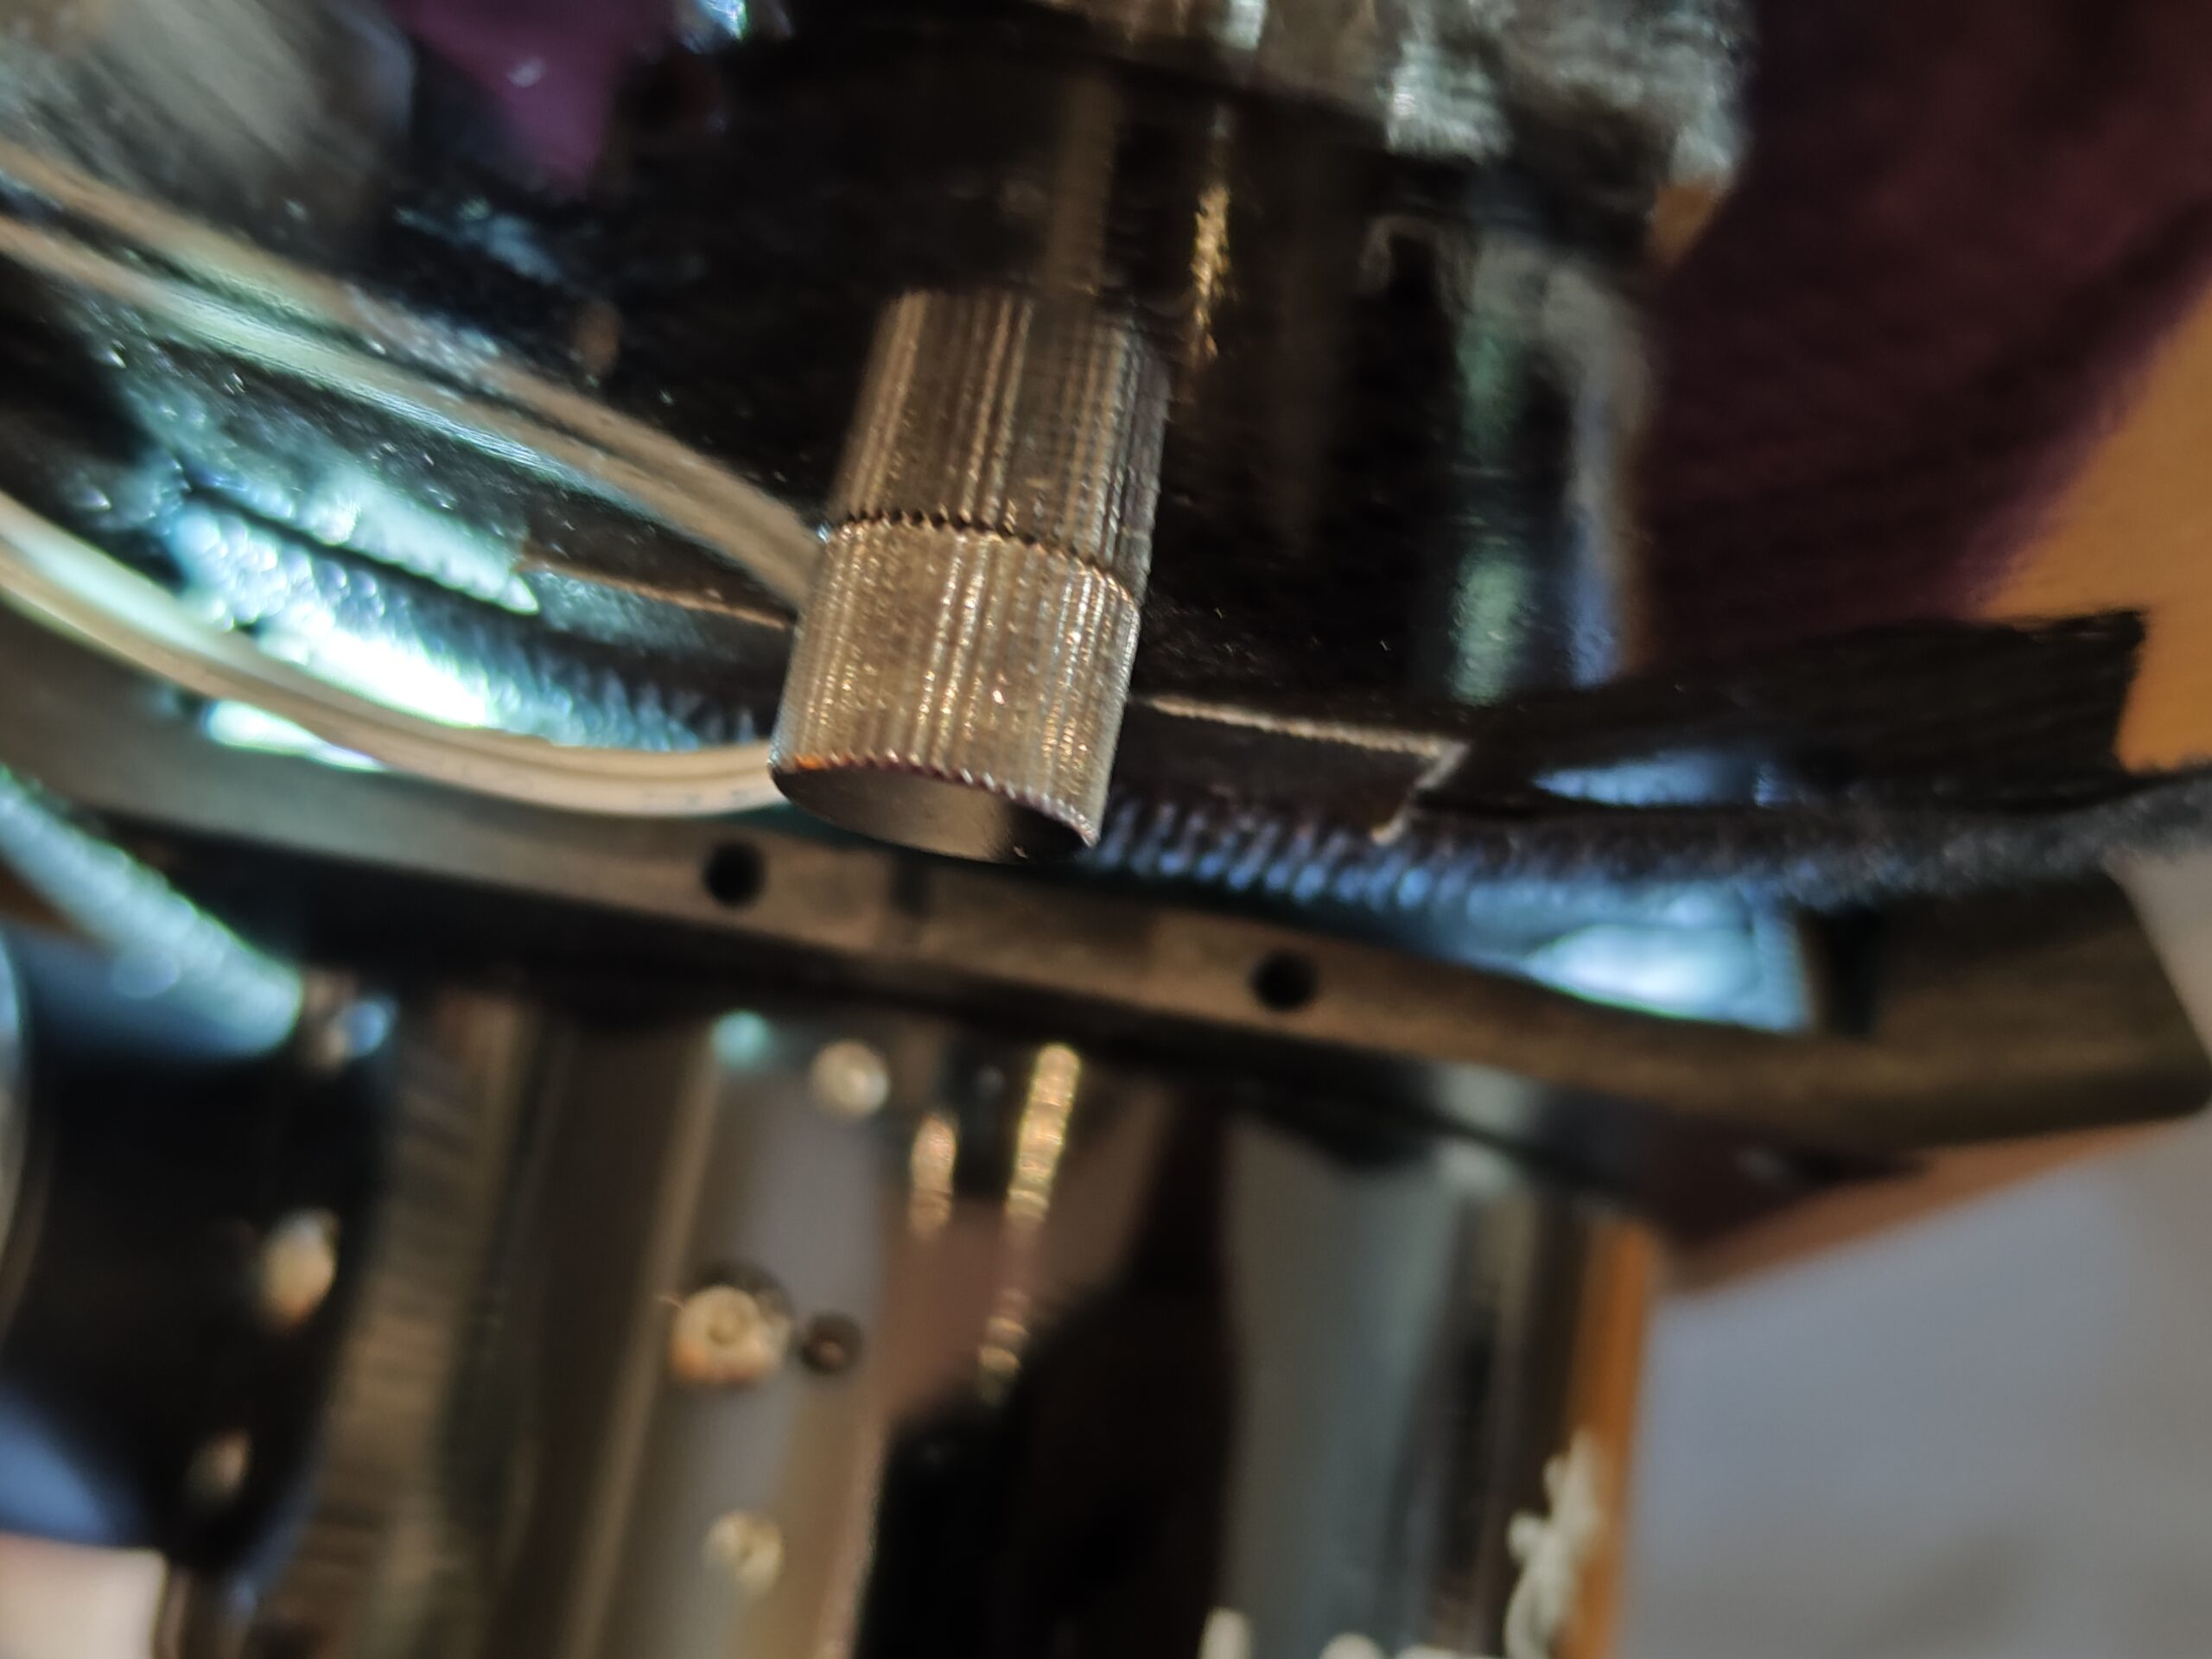
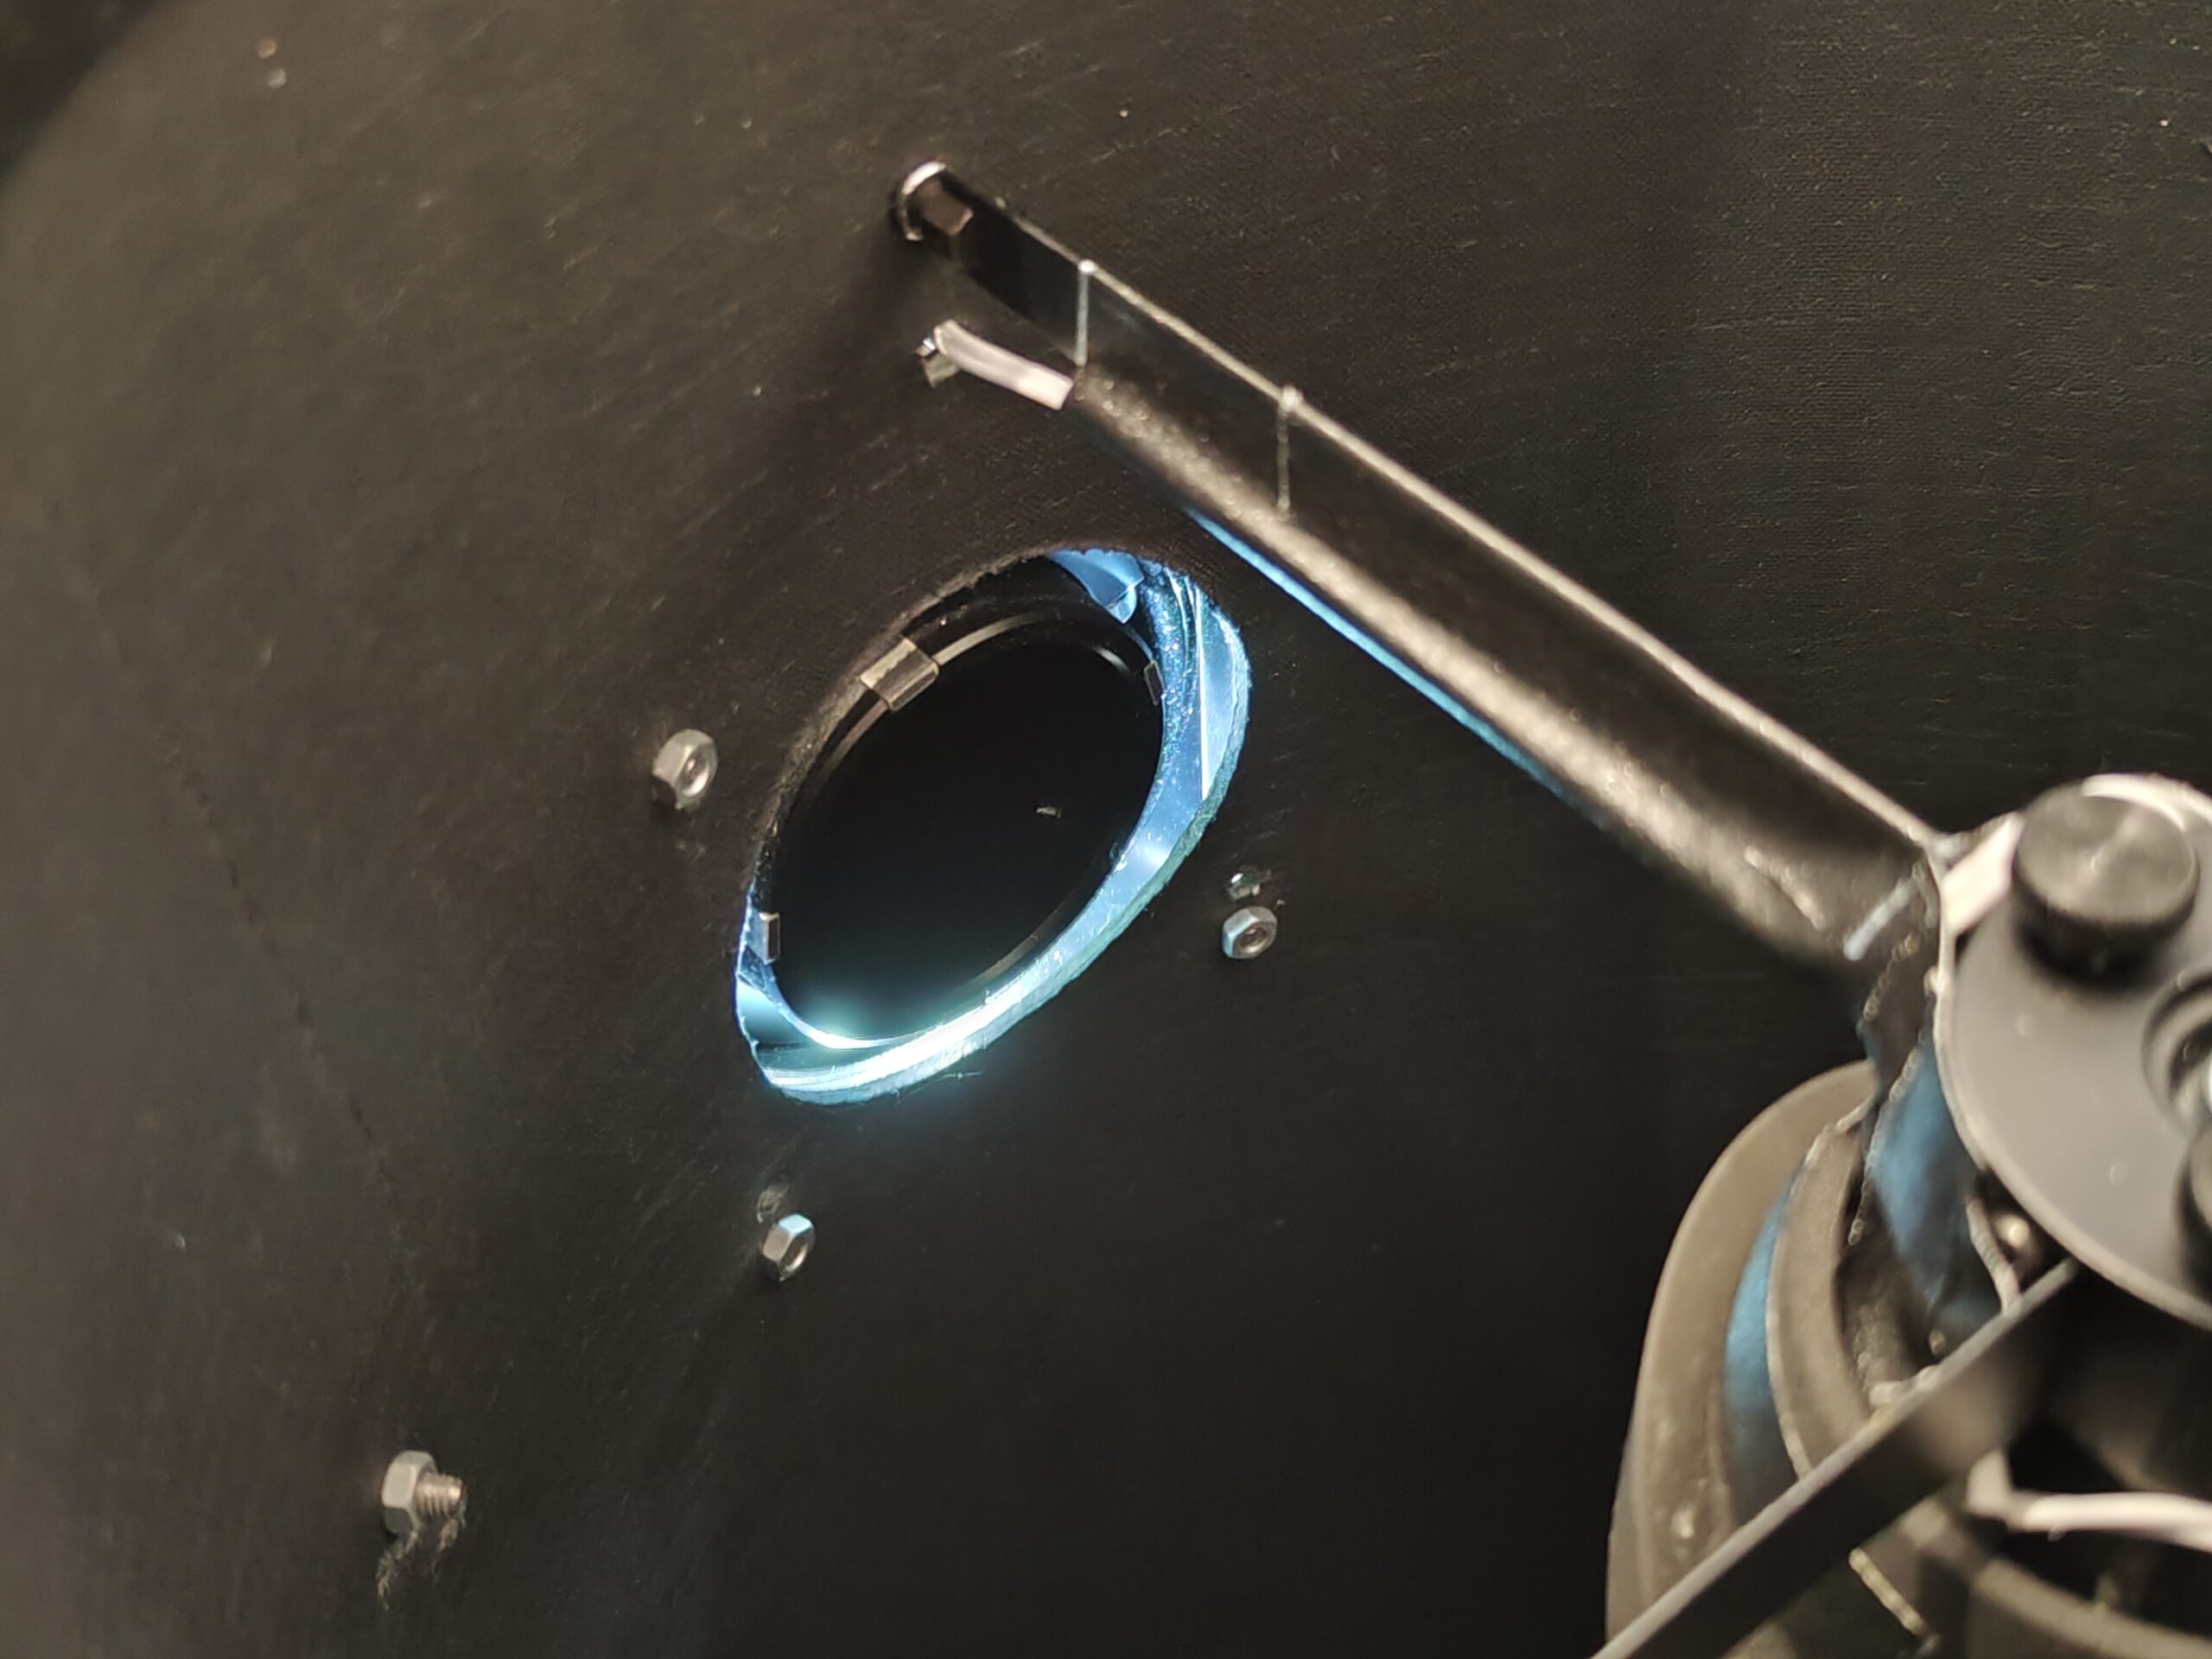
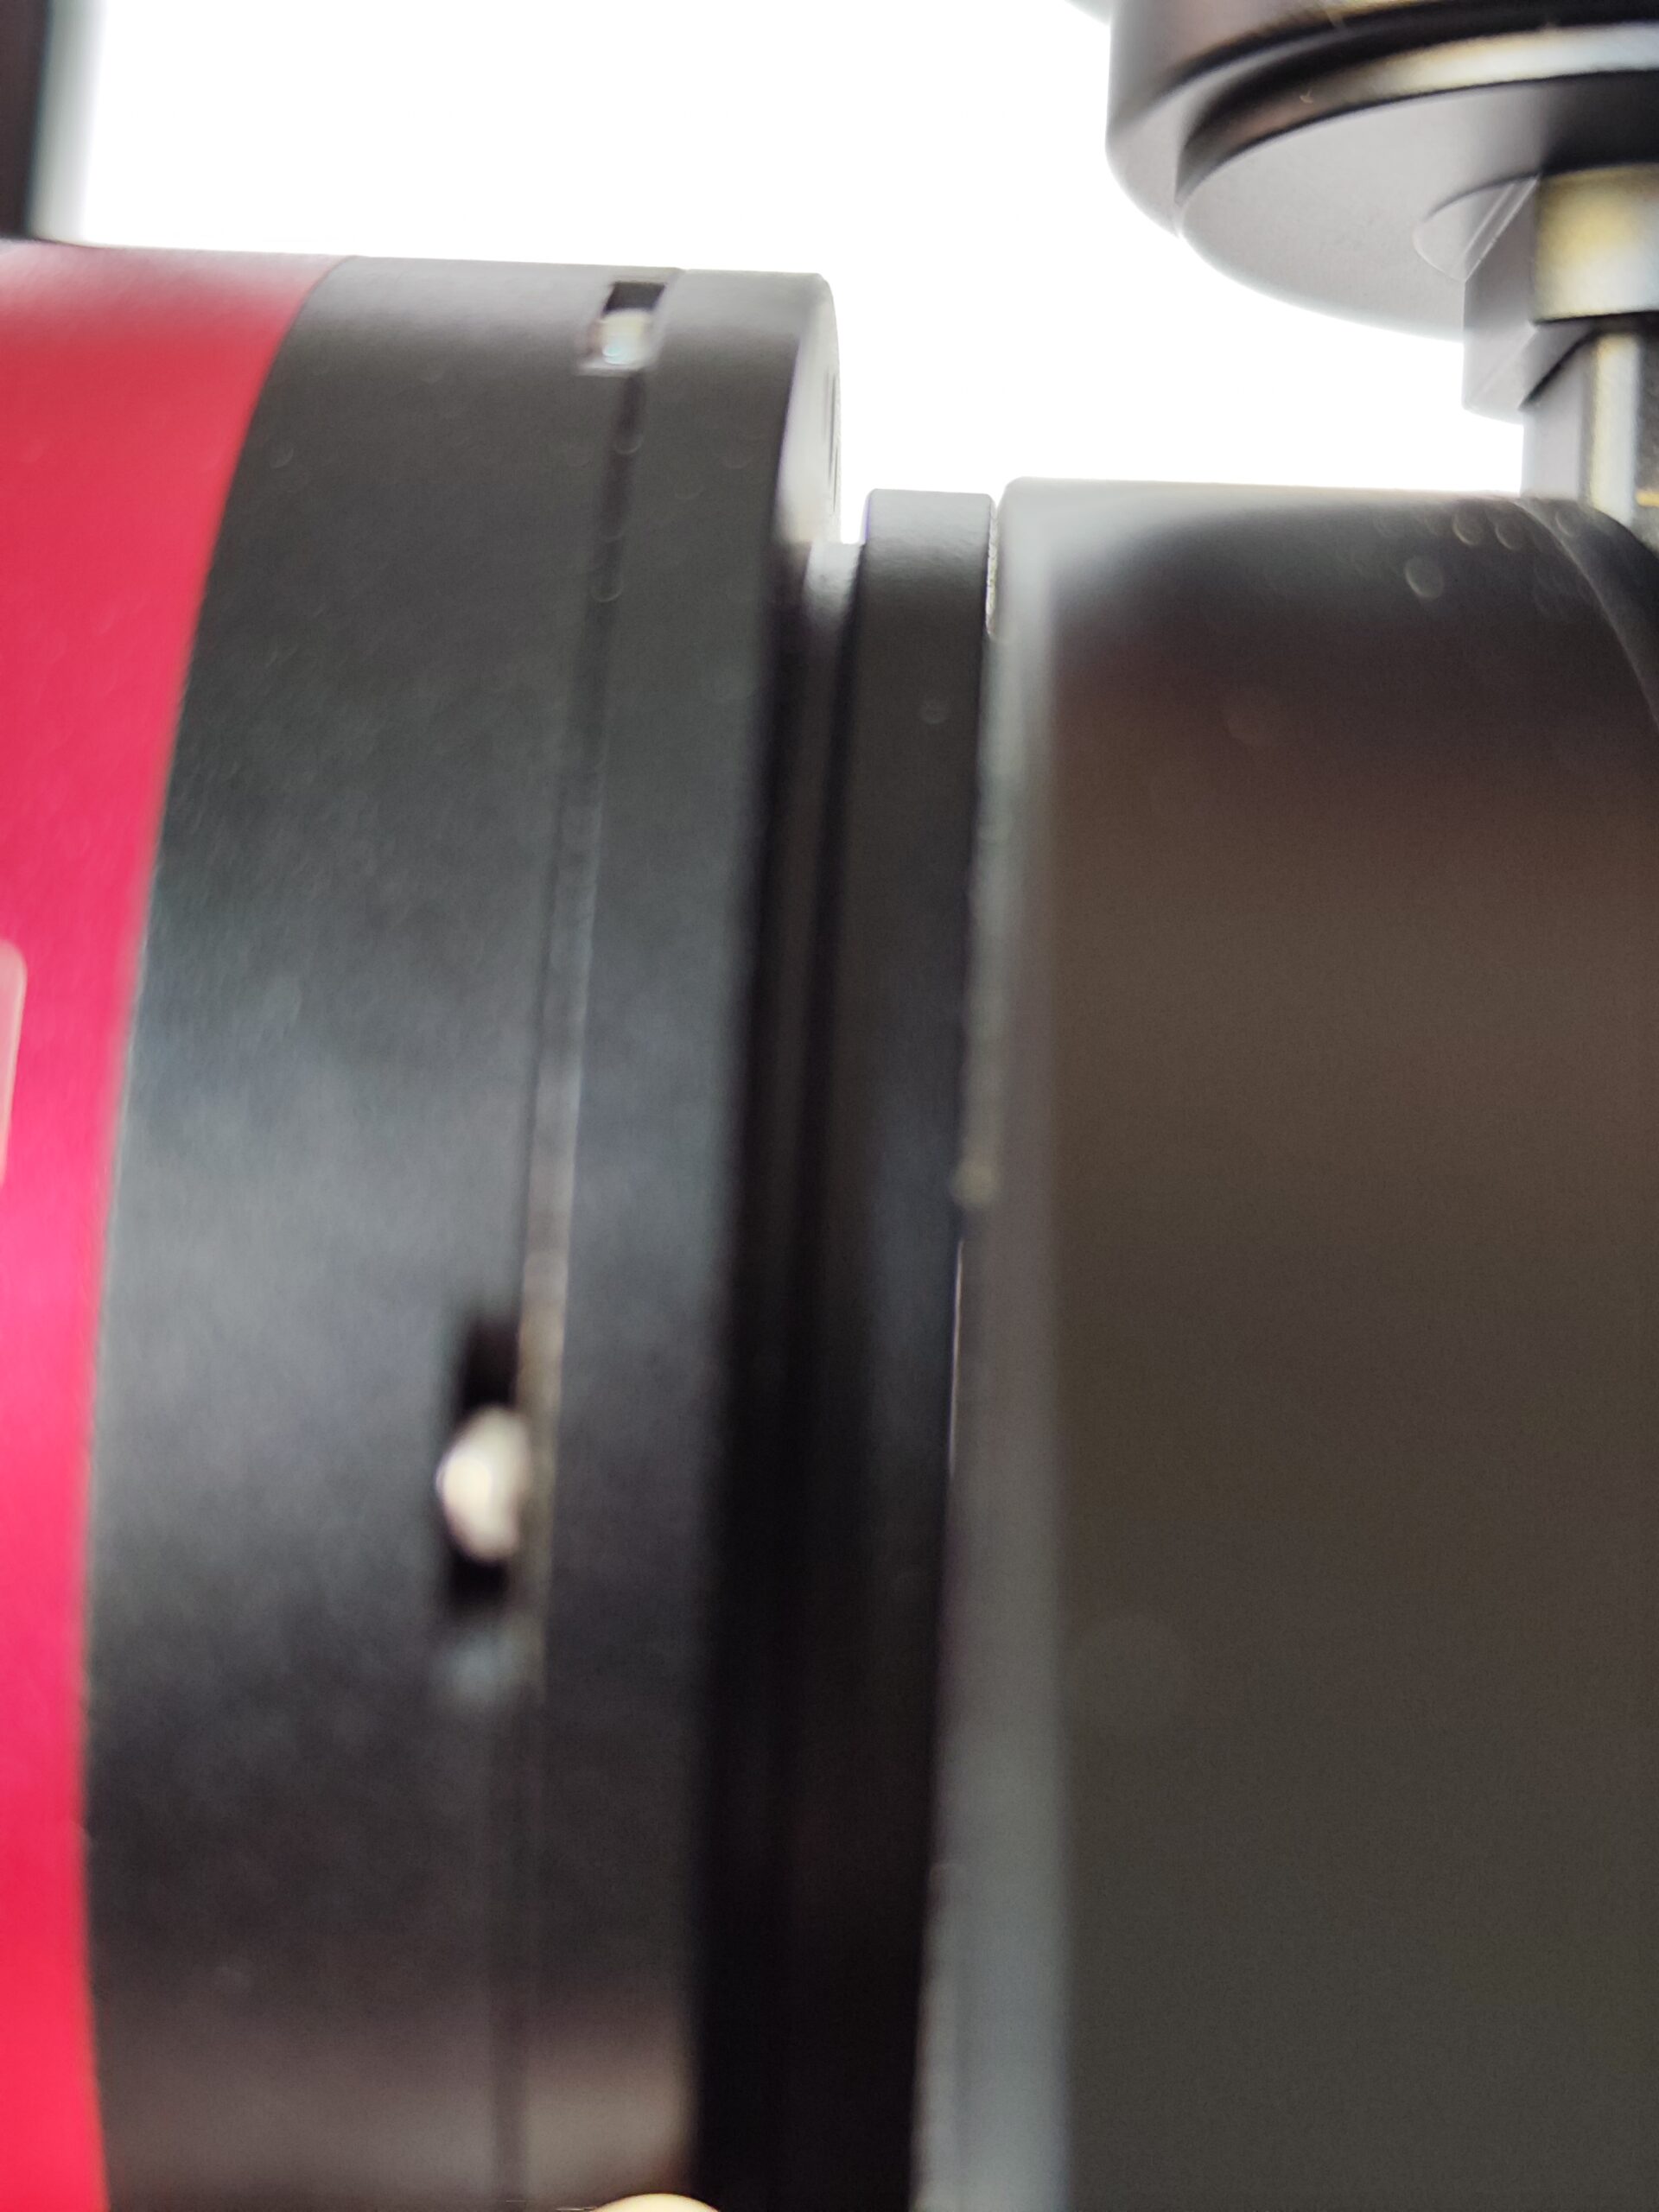
Then I located several light leaks in my imaging train. The worst leaks were at the focuser base, the Off-Axis Guider and the mounting adapter between camera and filter wheel. After closing all the gaps, the results improved. But still the gradients were clearly visible in moderately stretched images.
Focuser base has no light shieldingQuite intense light leak made visible by flash light pointed at focuser baseLight shining through at camera flangeCore of imaging train, showing Off-Axis Guider cover to block light
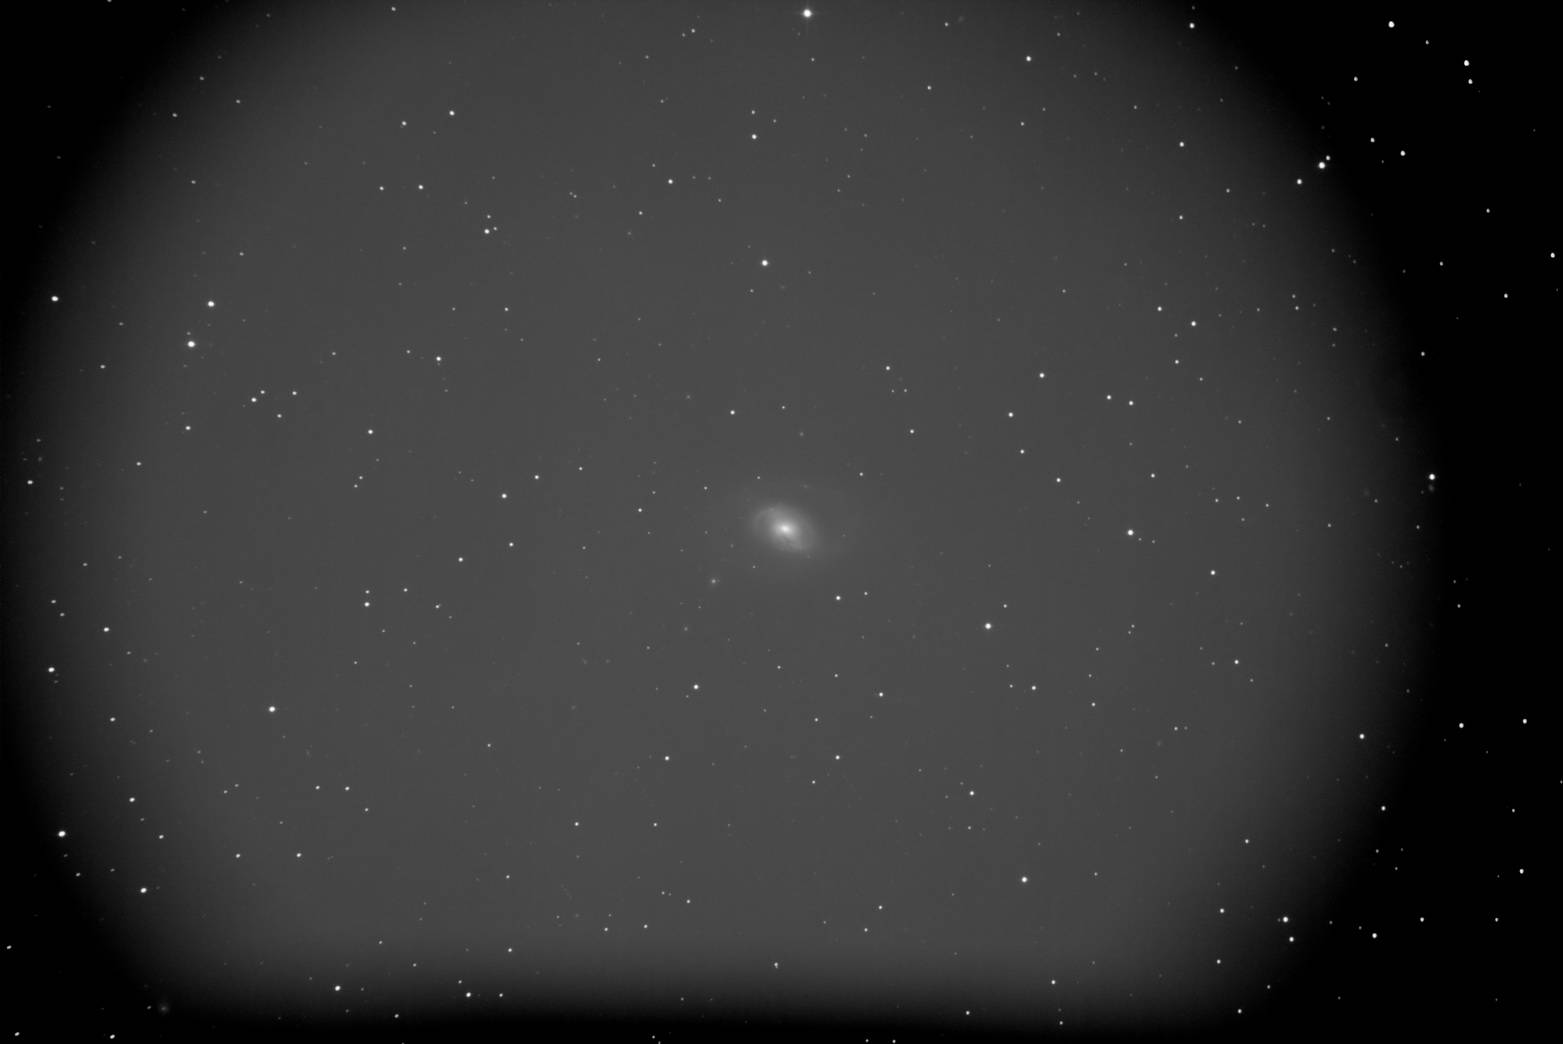
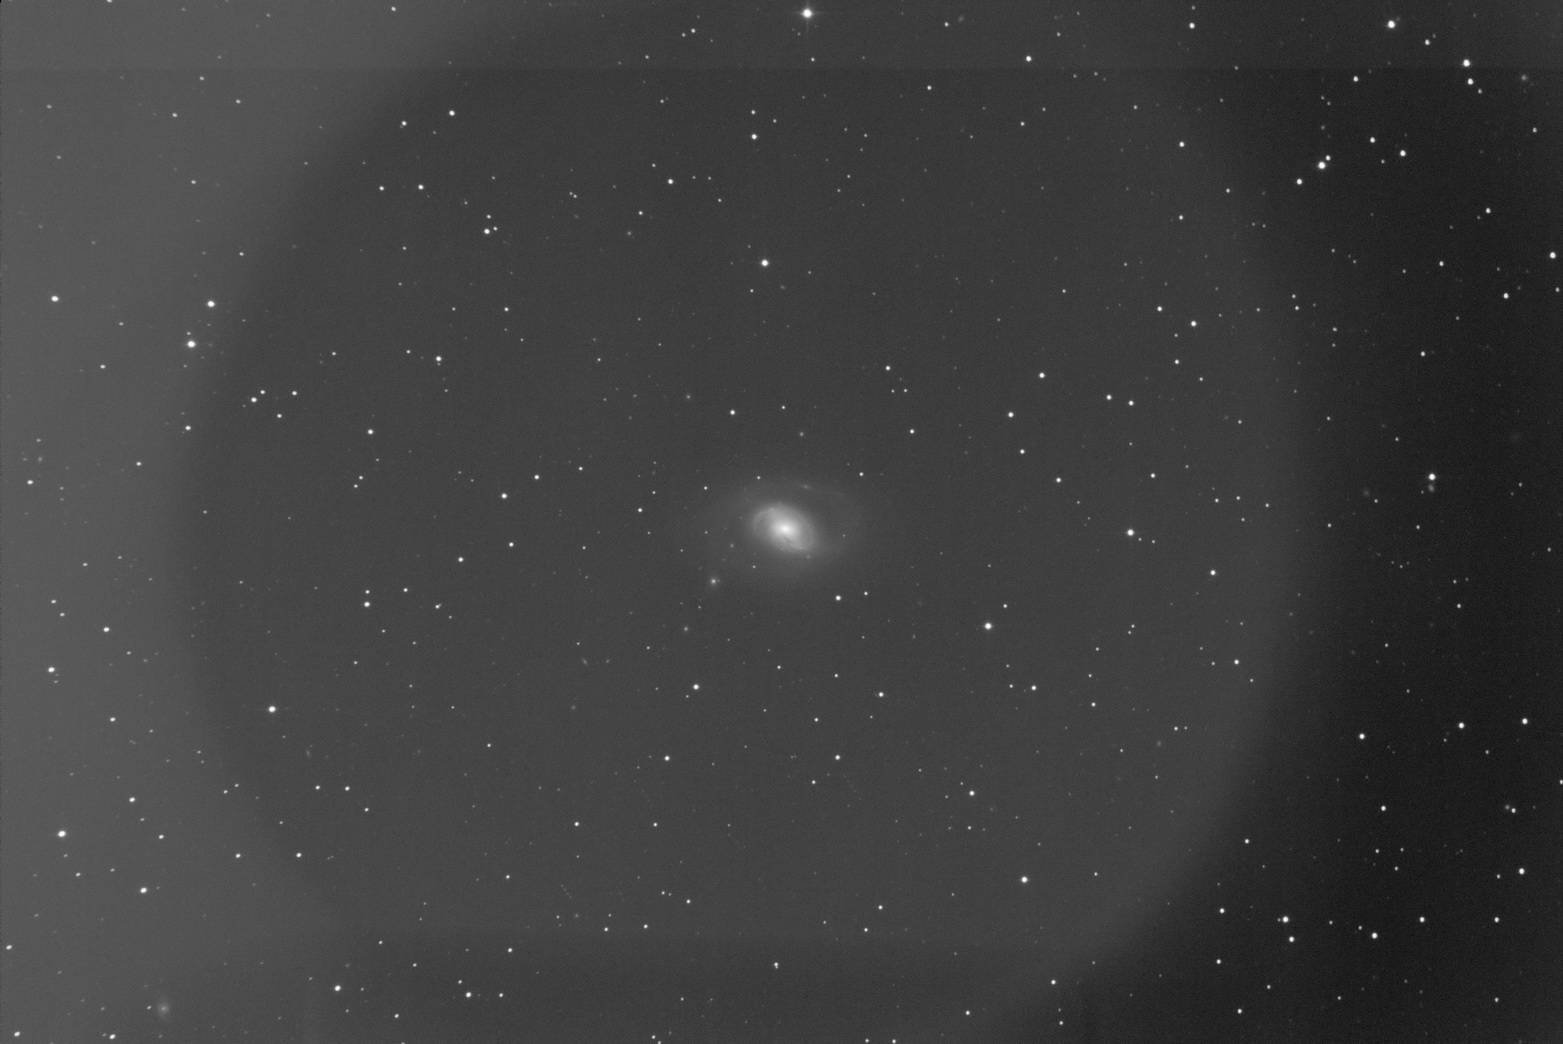
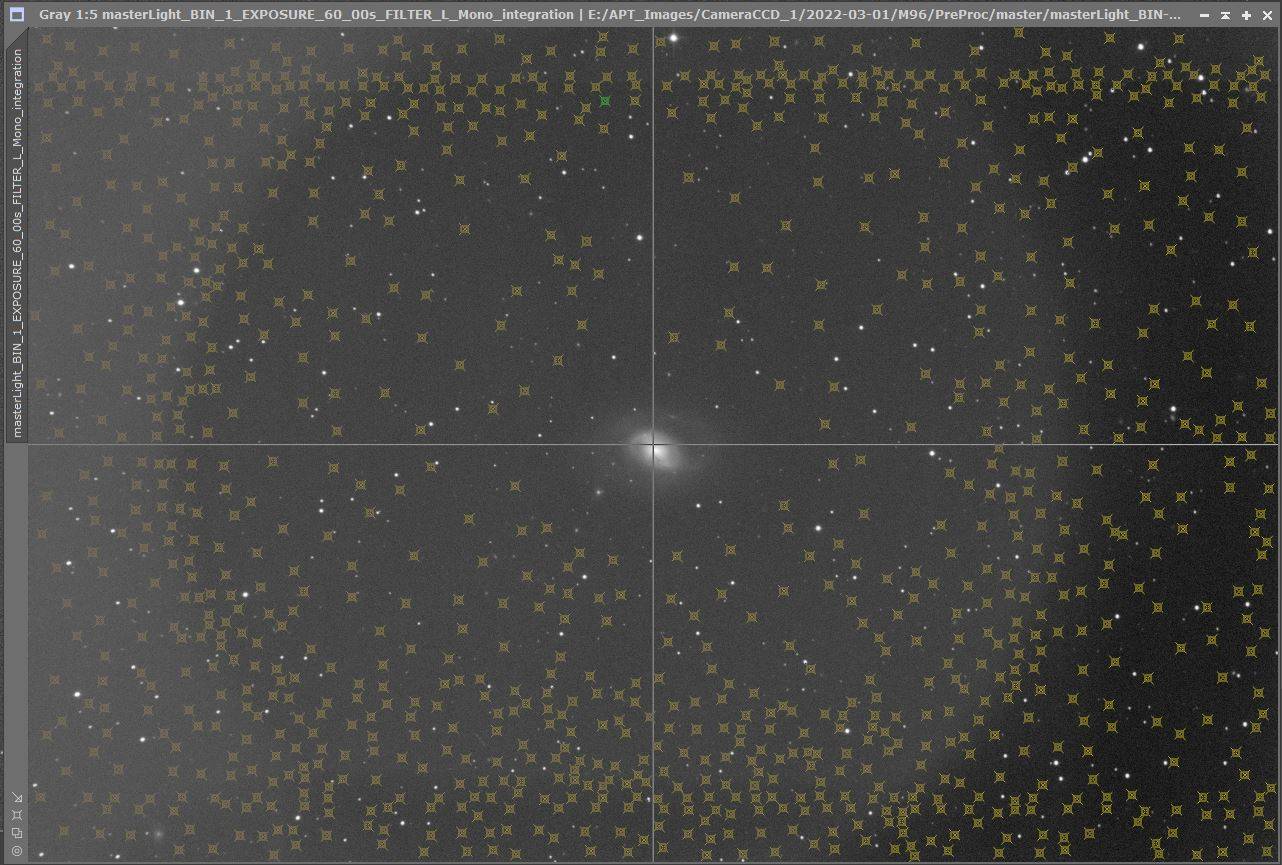
So in all the past 3 years using this setup, my only chance to create acceptable images was to reduce as much of the gradients as possible in post processing. To accomplish this I had to set several hundred calibration points for background elimination in Pixinsight (loosing any chance to process weak background nebulosity or the like). This was a tedious work, as all calibration points had to be set manually (you may not have any stars or parts of nebulosity, a galaxy within the calibration point rectangle). And still there remained some residue if the gradients. So the results were not of the quality I strived for.
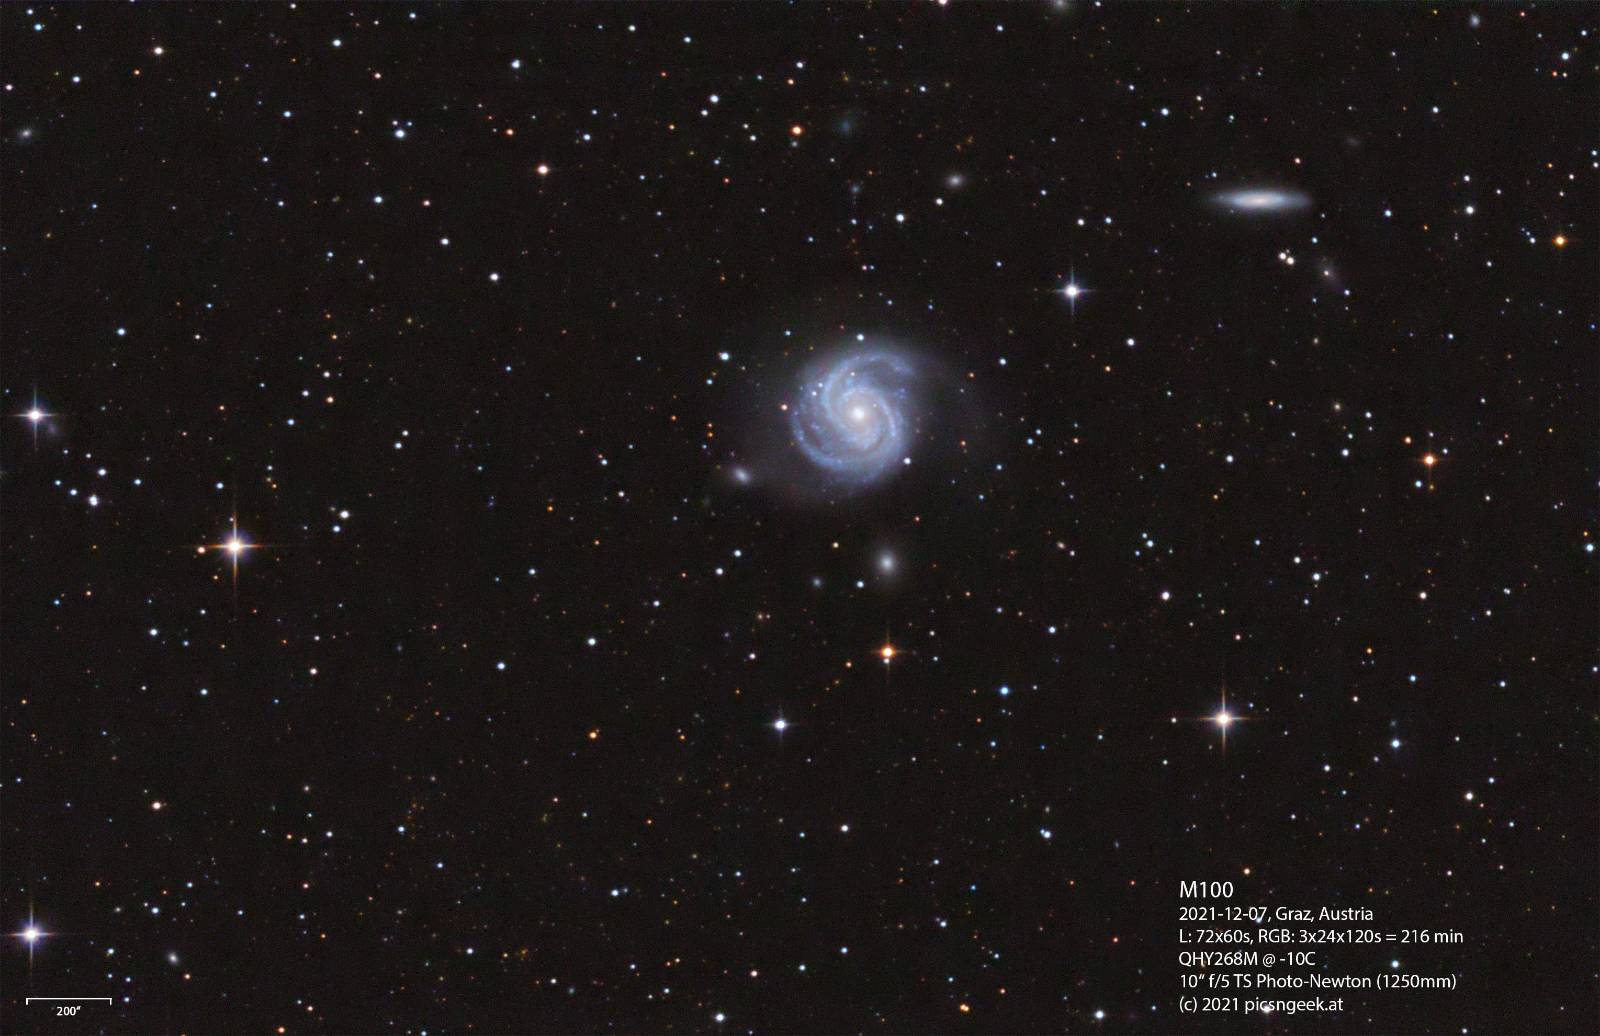
Typical raw image before calibration, stretchedImage after calibration, stretched, showing gradient and ring patternImage crowded with 800+ calibration markers for background eliminationExample of M100 after final processing (including background elimination)
Finally, I technically analyzed my scope and imaging train to check for defects like vignetting. I could not find anything, causing such a pattern. So I concluded, the only culprit possible could be the coma corrector.
History:
After several years using an economic GSO corrector, where stars have never been perfectly small and round in my setup, I switched to the Gyulai Pal designed TS-GPU corrector. Images have been really nice. But back then, I used a camera with an IMX183 sensor (15.8mm diagonal). A bit later, I switched to the IMX571 sensor, which has a significantly larger active area with a 28.3mm diagonal. Initially, I could capture images, which calibrated well. Though at this time, the street lights were far less bright and not LED based. So the filters could get rid of the stray light and light pollution. Now, with the close to 4x stronger LED street lights, everything changed.
As I (hopefully) closed all the gaps where light may enter, the front of my telescope should be the only place where light should enter my imaging train. Even with a dew shield it might be possible that light may shine to the front element of the TS-GPU corrector. Either direct or by reflection of the inside wall of the dew shield (which is not the deepest and blackest black possible), the corrector may pick up some stray light. To rule this possibility out, I attached a 10mm extension tube to the front of the corrector. But unfortunately, there was no change in resulting images.
I could borrow 2 types of coma corrector from astronomy club fellows to test my assumption. So to test, I have one of each corrector: my TS-GPU, a Baader MPCC III and a TeleVue Paracorr. During the last weeks I captured M16 with all 3 coma correctors in L(RGB) and H-alpha from my home with the identical setup.
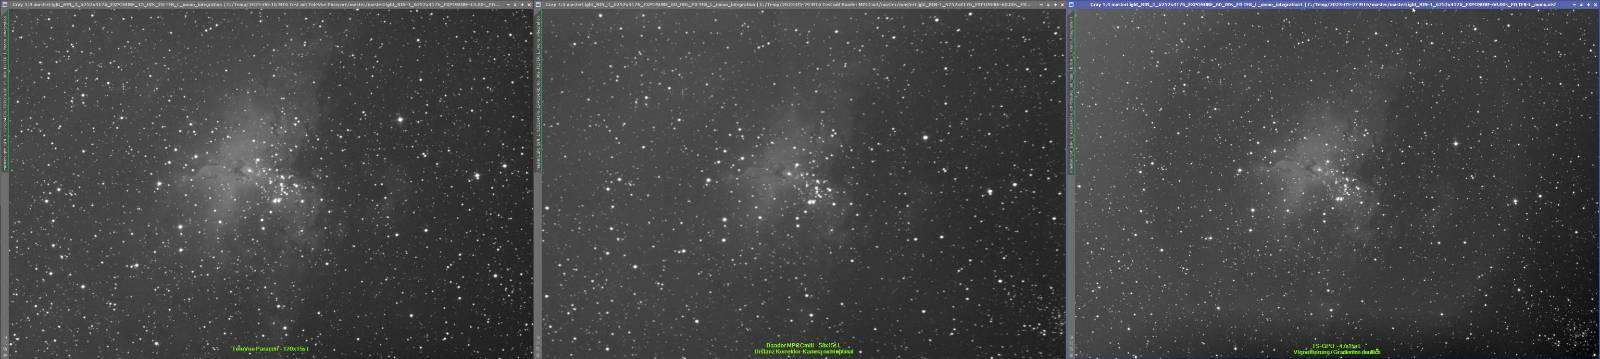
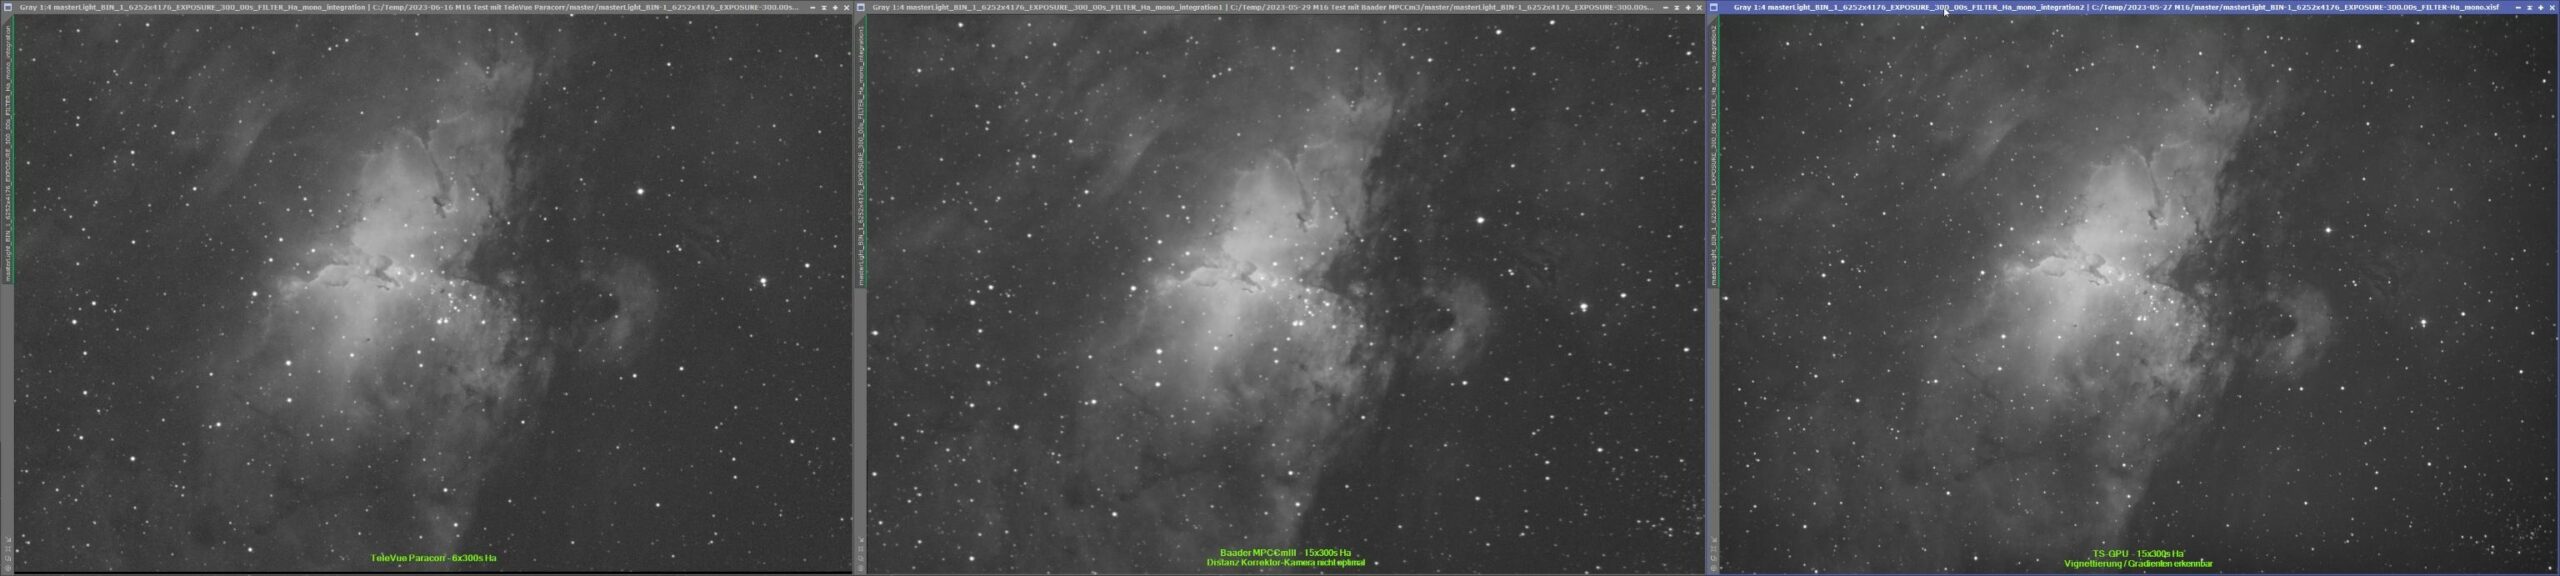
After calibration and stacking, I applied a background neutralization with only 8-10 calibration points to remove the large scale gradients from light pollution. Then I simply stretched the histogram of the images with automatic screen transfer function in Pixinsight and placed the 3 images of each filter set side by side for comparison. Well – I think, there is not much to say. Only the GPU coma corrector leads to the image defects.
Comparison of M16 in luminance with TeleVue Paracorr, Baader MPCC III and TS-GPU coma correctorsComparison of M16 in H-alpha with TeleVue Paracorr, Baader MPCC III and TS-GPU coma correctors
Observations:
the TS-GPU corrector is with 10cm quite long.
the focus position of the TS-GPU corrector lies just a few millimeters above the inner limit of my focuser
the TS-GPU corrector protrudes in the tube by 2.5cm (1 inch)
both of the other correctors (TeleVue and Baader) require the focuser at the outside limit or even beyond (using extension tubes).
the TeleVue Paracorr is 7cm long- the Baader MPCC measures less than 3cm- At focus, the Baader and TeleVue have their front lens element way inside the focuser tube. Therefore, no stray light may enter the corrector
Conclusion:
In light polluted skies, especially with nearby (street)lights, which possibly shine in the telescope, you have to be extra careful. Any stray light may cause severe trouble in astro photography. Locating the light leaks may get intensive and very time consuming. But it is well worth it to spend the time. Your efforts will pay off in post processing and final image results!If you suffer from effects comparable to mine, you should not only hunt down the obvious light leaks (using a strong flash light or even sunlight). You should also check each and every optical component, if at some point stray light may enter your optical train. Try to close gaps and holes and shield your system as good as possible!
This site uses cookies. By continuing to use the site (including navigation and scrolling), you agree to the use of cookies. more information
The cookie settings on this website are set to "allow cookies" to give you the best browsing experience possible. If you continue to use this website without changing your cookie settings or you click "Accept" below then you are consenting to this.