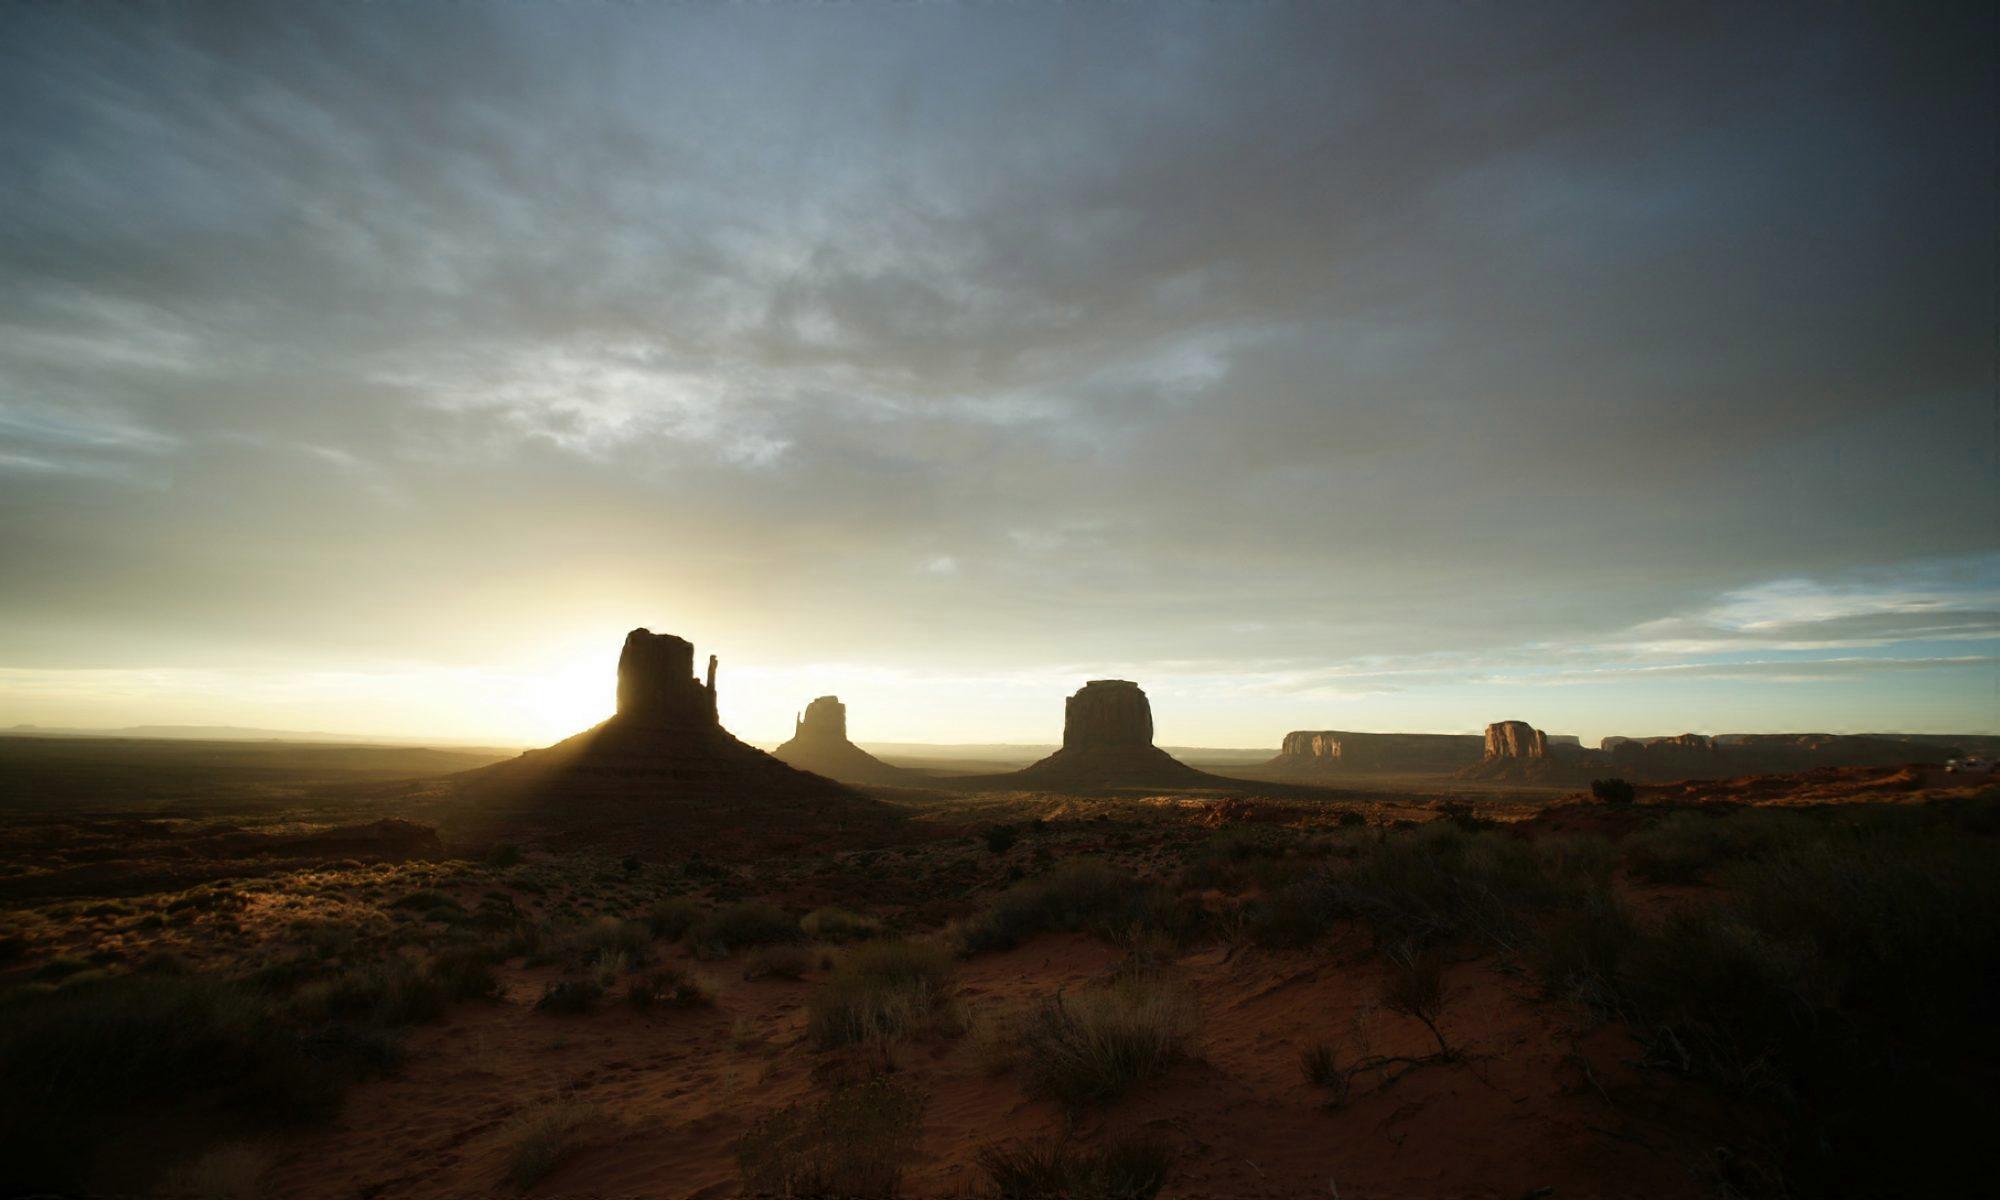
On a wonderful day with blue skies I took my (newly) modified full spectrum camera to Schlossberg in downtown Graz. All images shot with a 720nm infrared filter attached to the lens…


… in my world, there is Photography, Astronomy, Electronics, Software Engineering, 3d printing and much more
On a wonderful day with blue skies I took my (newly) modified full spectrum camera to Schlossberg in downtown Graz. All images shot with a 720nm infrared filter attached to the lens…
After converting my Sony A6000 camera to full spectrum capabilities, I finally got a sunny day to test the “new” camera, using a 720nm IR filter…


How to encourage kids to eat more veggies? Prepare the food in an attractive an appealing way. Most of the kids will dig in even fruit and vegetables they usually won’t eat voluntarily…


On the menu:
A giant snake (Cucumber, round cuts of cheese, tomato, sausage, sweet pepper)
Egg-mice (boiled eggs, slices of carrot for ears, pepper grains or ketchup dots for eyes and a entire chive stalk for the tail)
Apple-Banana-Grape turtles (apple cut in halve with ornaments cut, a chunk of banana for the head and 2 grapes halved for the legs)
The fun part is, kids will likely assist when preparing the food 🙂
For quite a while I was looking for a camera, capable of better capturing the 656nm light of the H-alpha emissions from deep sky objects like gas nebulae or the suns prominences. Further more I was curious about infra red daylight photography. First, I thought I should buy an astronomy camera with very low noise due to active cooling. Unfortunately, such cameras are with a reasonable price tag. Further more, the astronomical cameras require an external power supply as well as a computer for control and data acquisition. Having such a camera would therefore only be reasonable, when I would spend several nights each month to capture images.
Then I thought, there are several regular DLSR cameras available (directly or by modification) which are capable of infrared or even full spectrum photography. These cameras or the modifications are available at attractive prices. Further more, the camera would be compact, easy to handle and suitable during daytime as well. There are 2 drawbacks in deep sky photography, which only really become relevant, when capturing very faint and distant objects at higher ambient temperatures:
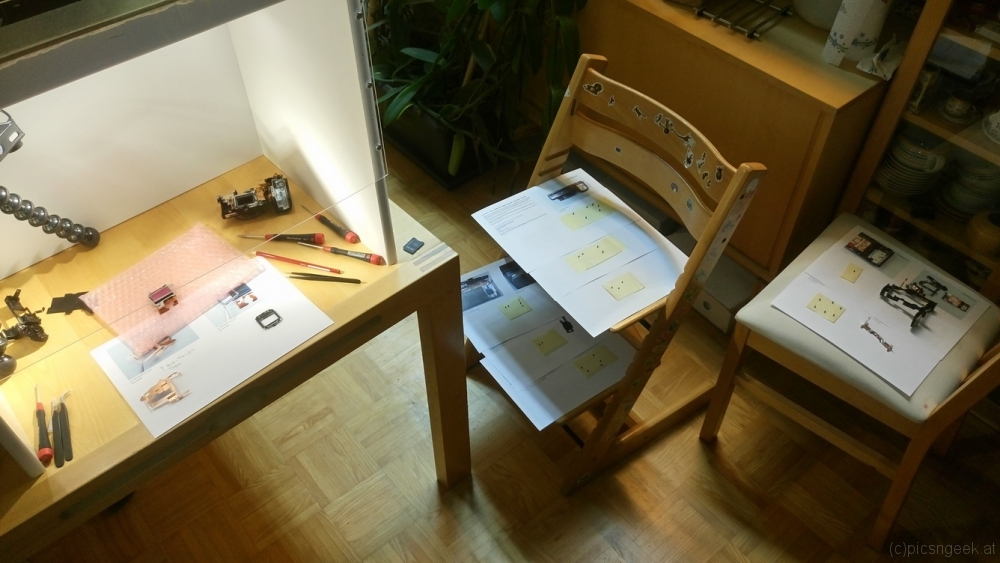
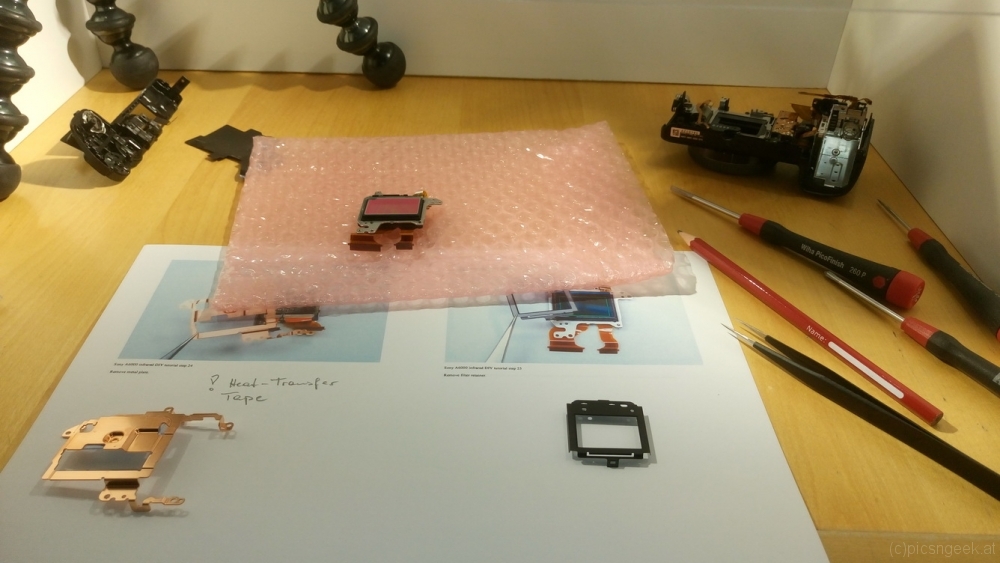
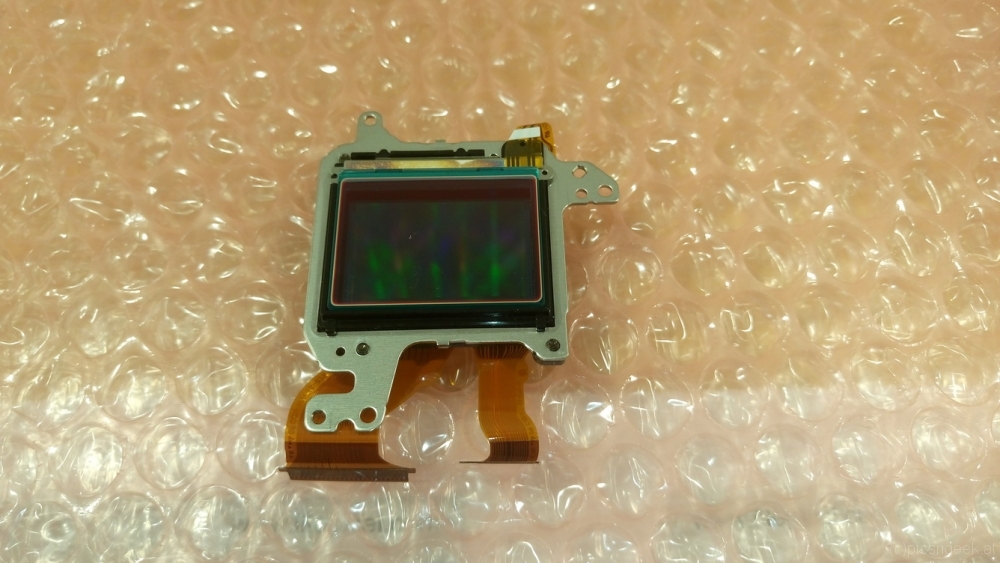
The modifications would imply to change the IR filter, which is attached in front of the imaging sensor. The whole procedure requires a service manual or a detailed description of how to disassemble the camera of choice. Fortunately I came across a very detailed step by step description of the disassembly process of the Sony Alpha 6000 camera. The description is (until now) available here from the company Lifepixel. They are also offering conversion services if you are not up to the task. One of the biggest challenges is to cope with the rather delicate ribbon cables. Pay as much attention as possible when disconnecting and connecting these cables! Further more, pay attention to the position of the On-Off power switch! If you change the position before reassembling, you may break the switch or the ribbon cable the switch sits on. If you do break this switch you are in serious trouble!
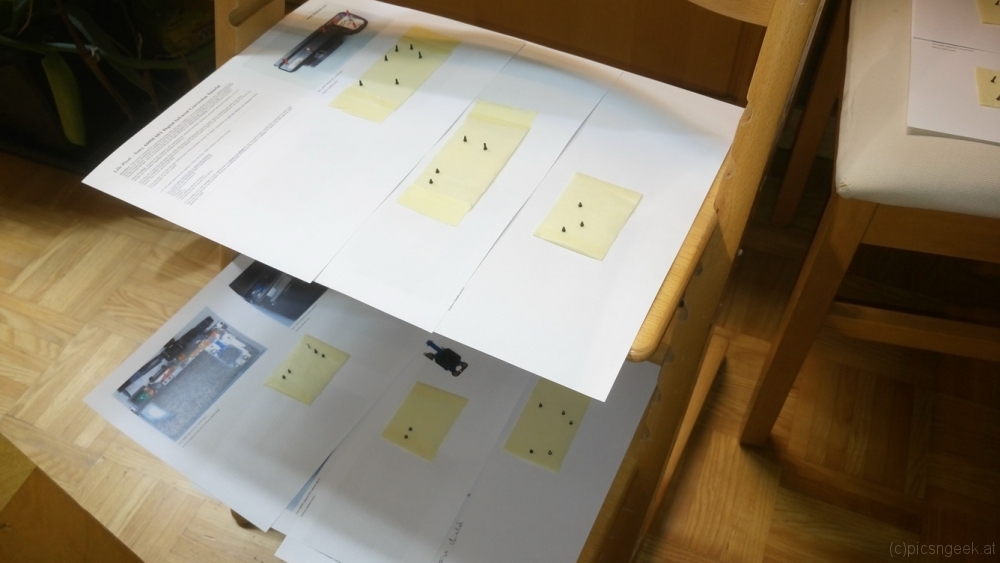
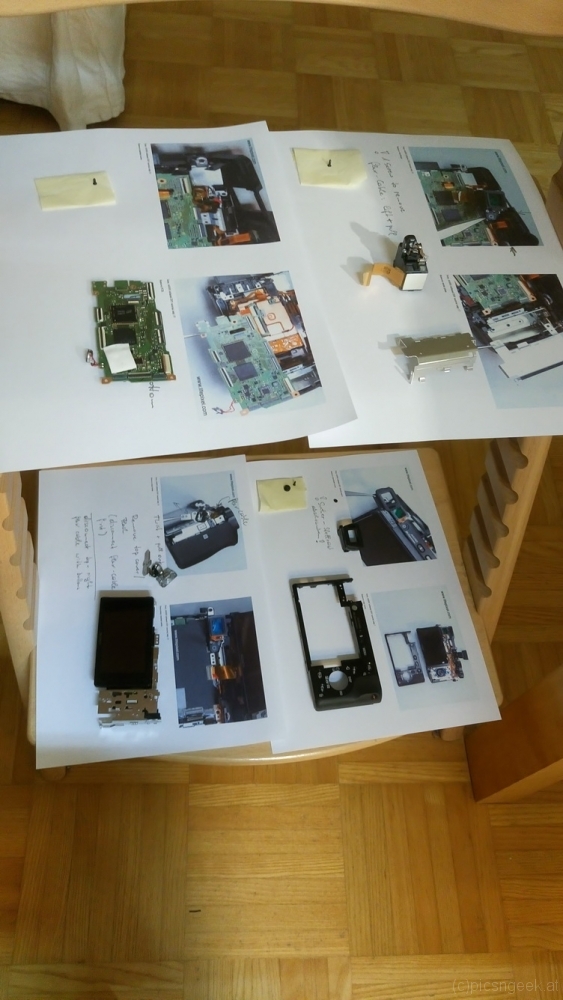
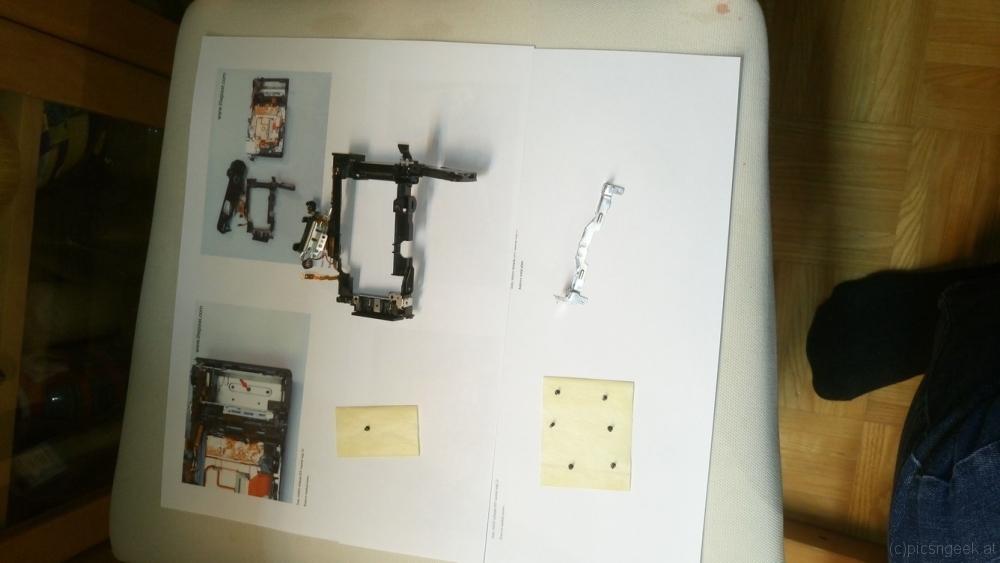
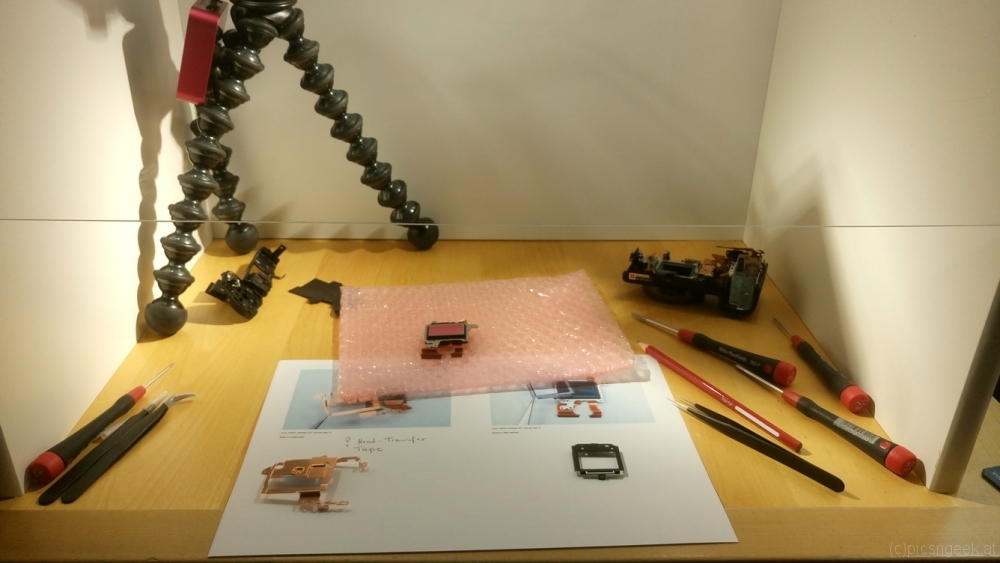
A hint for organization: During the modification process, one has to remove a whole lot of screws in different shapes and sizes. To keep all the screws and parts organized, I printed the complete step by step instructions with two steps per page (side by side). on the bottom of each page I attached a strip of masking tape, with the sticky side up. So I could place all the screws in the corresponding positions below each steps photo. Et voila! All parts are kept where they should be and matching the sequence.
Hint concerning electronics: You are dealing with highly sensitive electronic parts! You will create enough electrical charge to destroy the electronics when you move around! Use wrist band grounding wires and static precautions when operating with such sensitive devices!
Upon preparations for my Sony A6000 camera full spectrum modification, I didn’t find any reasonably priced IR-filter replacement. Most of the offerings I found have been way above any reasonable price. So I decided to try cutting my filter replacement myself…
I did some research on cutting filter glass. Most of the guides I found used window glass cutters to score and break the glass apart. This technique is in my opinion perfect with most ordinary glasses. Though filter glass, which is hardened and coated does not break evenly. You seem to get very rough edges, which would not be in acceptable tolerances for me. Cutting a larger piece and grinding down to desired size would be the only option with this method.
An other method I found for cutting glass (in general) was, to use diamond plated cutting wheels. All the results I have seen, provided nice cuts. So this should be the technique to go for…
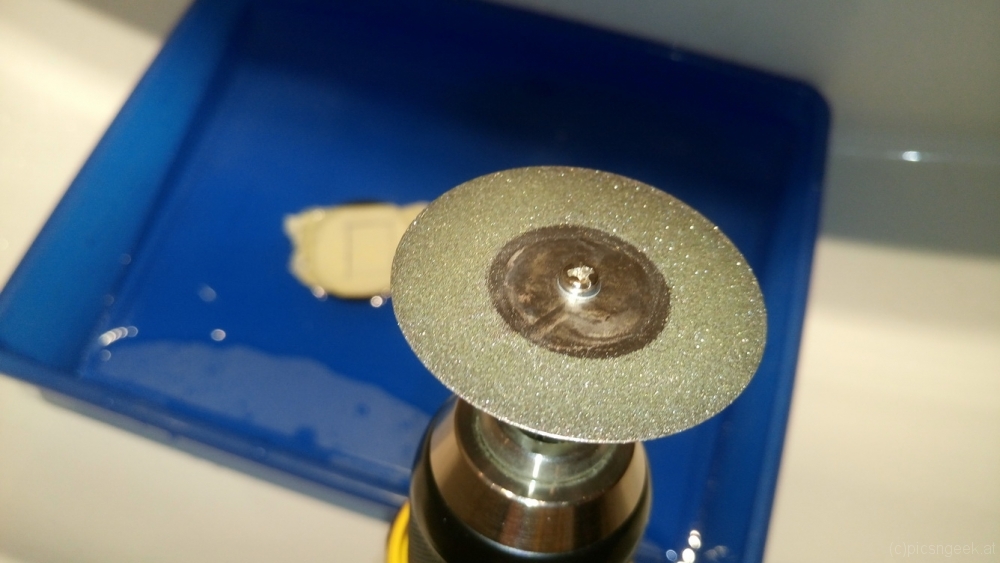
I previousely did use 1 inch diameter diamond cutting wheels on several occations. But for cutting a nice and clean line, I purchased a set of 50mm diamond plated cutting wheels with less than a millimeter thickness. These were available online for less than 10 EUR.
Preparations and cutting:
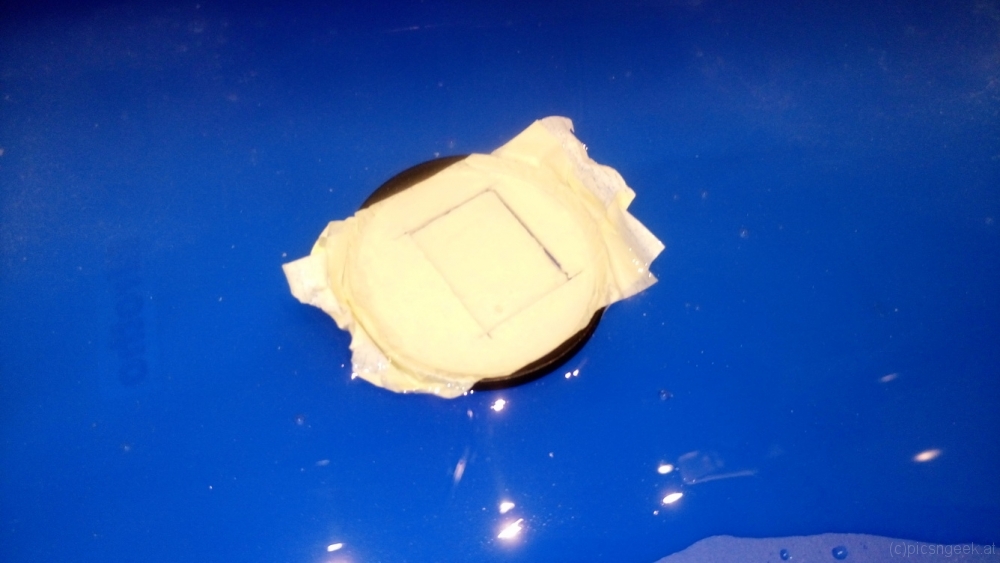
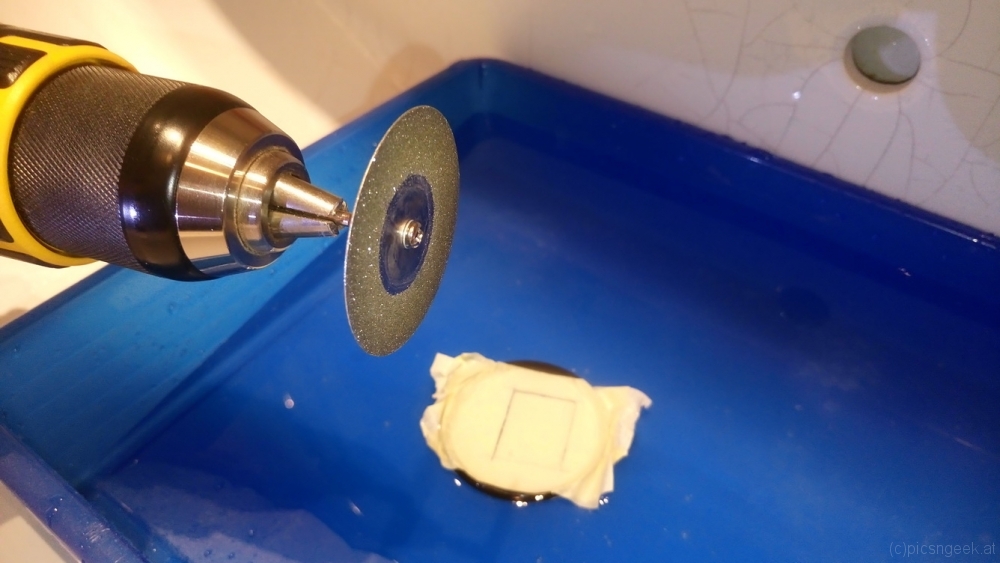
The easiest way to mark the outline of the desired filter is, to stick a strip of masking tape on both sides of the filter. This has two benefits:
1) you can easily mark the lines with a pencil or waterproof pen
2) the surface of the filter is protected against scratches and durst
Now research the dimensions required and draw the rectangle on the tape. When you are done, go to your sink, take a medium sized flat container and fill it with water to approximately 1 cm level. Attach the cutting wheel to a battery powered electric drill (water + electricity is too dangerous!!!)
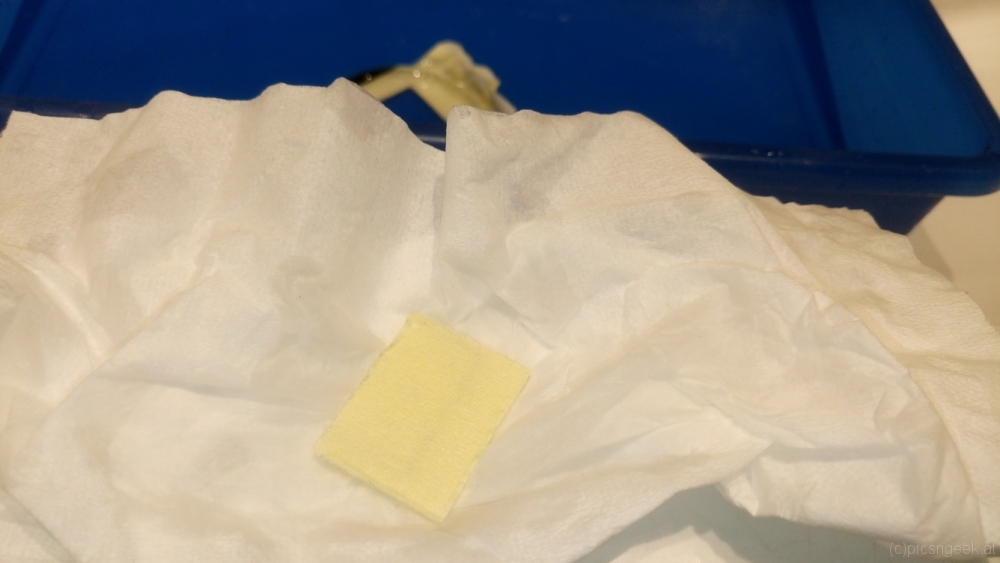
Use a very low speed to turn the cutting wheel. Now dip the filter in the water and bring it with very low pressure to the cutting wheel. Cut all four edthes from one corner to the other. Cutting is impressively easy and fast. Results are absolutely pleasing 🙂
When I started to modify second hand camera lenses, I soon found it rather difficult to keep dust away. Especially when I had to disassemble the lens for stuck aperture or compact cameras, I struggled to reassemble without dust on the lenses.
Some time later, I bought a Sony Alpha 6000 camera to modify for full spectrum (see seperate post). This triggered me to research for and build a clean room chamber…
A clean chamber may be constructed in several ways. The most compact and easiest way would be a transparent plastic container with attached rubber gloves. This would be OK for some tasks, but not for a mechanical repair or modification due to the huge amount of parts and tools to work with.
So I decided to go for a biomedical laboratory style system, which uses excess pressure ventilation with clean air. You can think of this as a larger box with a slit on the base of one side, where you operate. A ventilation system creates – preferably a laminar – air flow from the top, which exits through the slit. Before work begins, ventilation is turned on and all surfaces within the chamber are cleaned twice with a couple of minutes setting time inbetween, to remove as much dust as possible. When you move your hands or operate any objects within the chamber, do it slow! Clean all objects, tools and your hands before entering the chamber. The continuous air flow will now prevent dust from entering the chamber and you are good to go.
Construction:
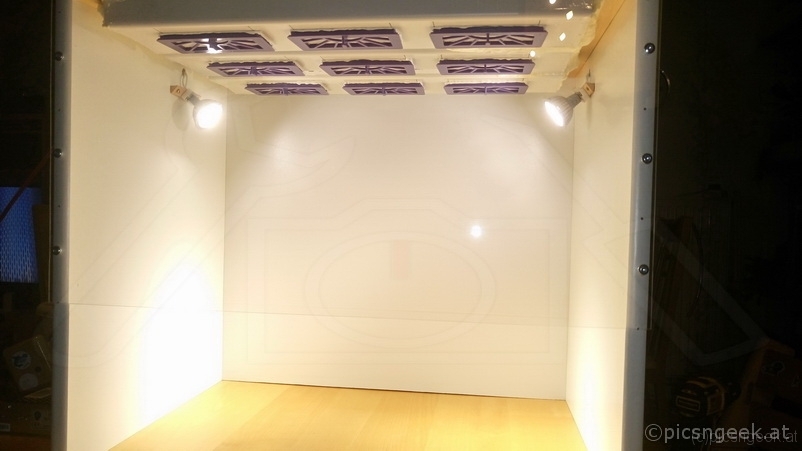
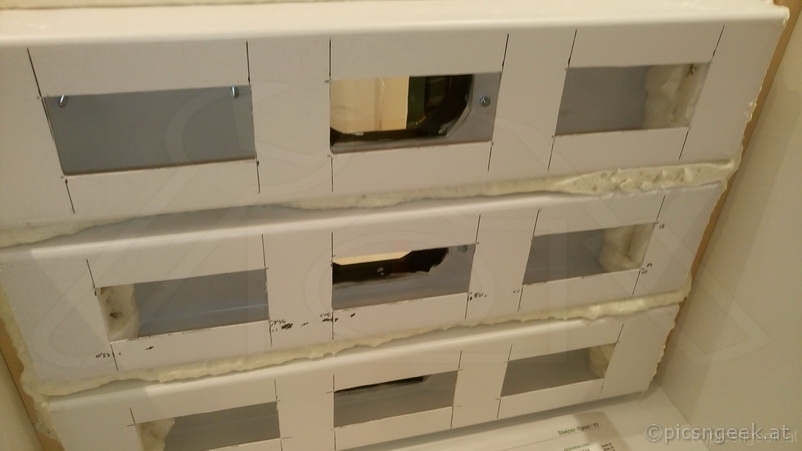
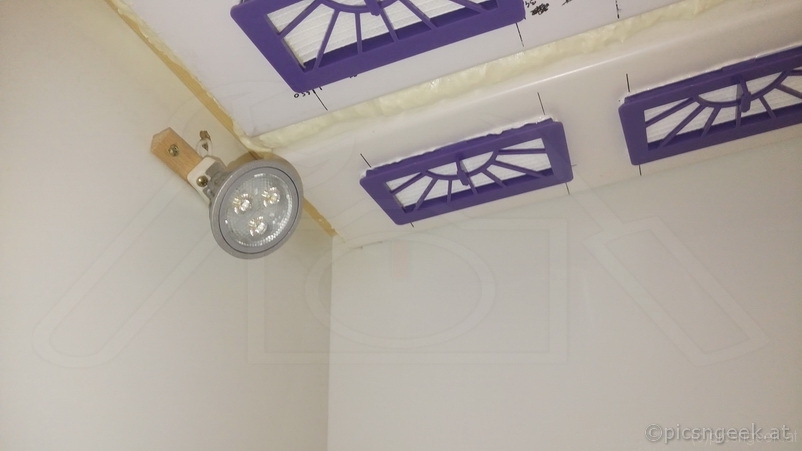
I used 4 sheets of decorative chipboard and a sheet of acrylic glass to contruct the chamber. All board were simply screwed together. In the top board I cut holes for the ventilation. Further more I installed 2 LED lights.
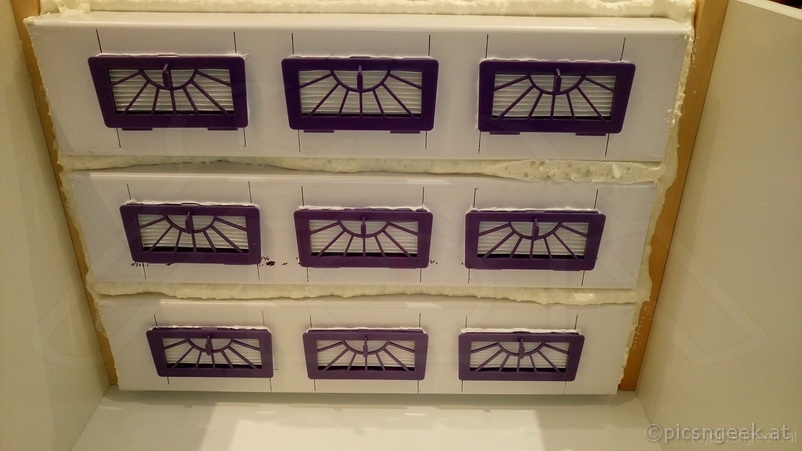
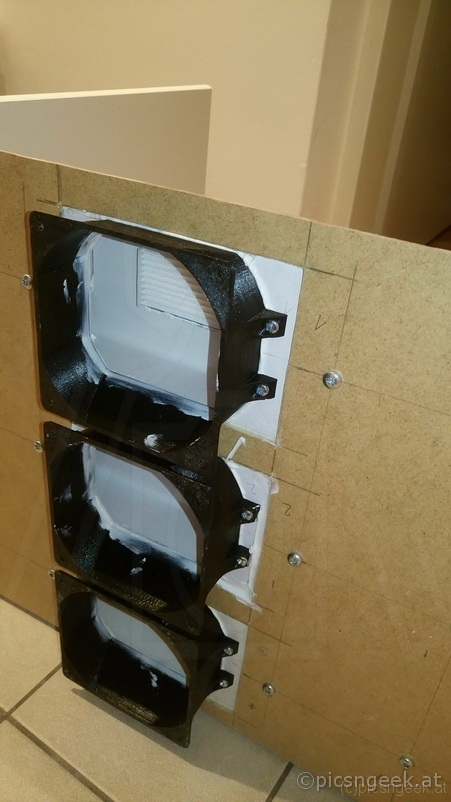
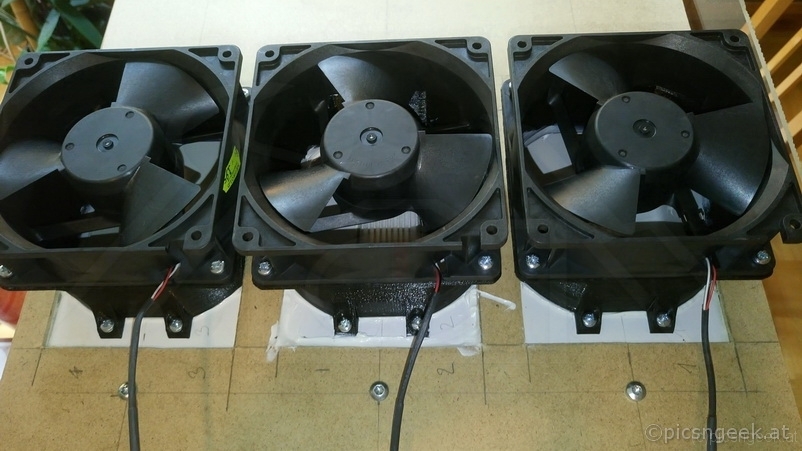
The ventilation is constructed of 3 seperate units. Each unit has a high volume 12V propeller attached to a flat duct system. The adapter for the propeller was CAD designed and 3D printet (available here). In each of the flat duct systems I installed 3 HEPA filters as outlets. So in the complete setup, there are 3 fans with 130cfm (220 m3/h) each (feeding through 9 HEPA filters) and 2 LED
lights. All components are powered by 12V, which makes the electrical setup safe and easy.
Hint on the HEPA filters: I bought the small filter cartridges for vaccuum cleaner robots, on ebay for a dollar each.
Parts used:
2x 40x60cm decorative chipboard (19mm thick)
1x 60x80cm decorative chipboard (19mm thick)
1x 40x80cm decorative chipboard or MDF board (6mm thick)
1x 40x80cm acrylic glass, 5mm thick
3x 120x120mm fan, 130cfm
3x 70cm flat duct 60x100mm
3x 3d printed fan adapter
6x End-caps for flat duct (or plastic sheets to fit)
9x HEPA filters cartridges
2x 3W GU10.3 LED lamp
2x GU10.3 mounts
1x 12V 5A power supply
several screws
mounting adhesive
Total cost was approximately 60 EUR
Welcome to Pics&Geek – MatPs view of the world!
With this site, I want to share some of my knowlege and experiences I gathered in different occupations. These include engineering, photography, astronomy, cooking, growing orchids and many many more! I hope you will enjoy!
Leave me a note or send me a message, if there is something I should add or improve!
MatP


What’s better to do on a warm and sunny late autumn day? Go out for a nice photo hike! The gorge was unfortunately in full shade when I arrived. But all the surrounding areas were lit by warm sunlight…
A good friend invited a larger group to his birthday party. We decided to give him as a present a TBS Vendetta quadrocopter (racing drone). But how to hide the present in an appropriate way? Well… let me think about it for a second…
Every time I’m invited, I bring a cake to the party. So why not use the cake as a decoy or gift wrapping?
Fortunately the drone is packed in a very neat box. Therefore I could create a cake with a hollow core, matching the size of the box. I inserted a rectangular frame with aluminium foil and filled a larger load of choccolate dough all around and above.
After baking, I wrapped the drone box in cling foil, added a cardboard sheet to the top with more cling foil as protection. The package went inside the cake. The cake received a good amount of white choccolate mousse as frosting. For the decoration, I added several choccolate bananas, cookies, M&Ms and the like to mimic a drone. Real drone propellers did the rest for the presentation 🙂


A friend of mine asked whether I would repair their camera. After dropping the camera, the zoom did block operation. After switching on the camera, the zoom tried to extend. Though as the soom got stuck somewhere in between, the camera retracted the lens and switched to error mode.
I agreed to do my best to restore operation. Unfortunately this task got more challenging as I expected:

Questions? Leave me a note! I will try to help 😉
This site uses cookies. By continuing to use the site (including navigation and scrolling), you agree to the use of cookies. more information
The cookie settings on this website are set to "allow cookies" to give you the best browsing experience possible. If you continue to use this website without changing your cookie settings or you click "Accept" below then you are consenting to this.