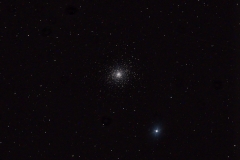
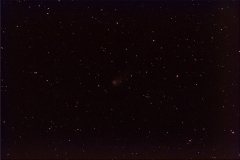
Star cluster M5 from the city

Finally a couple of cloud free evenings are here! So lets see, what is to see from the city…

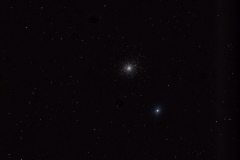
From a balcony facing south across a city, there usually is not too much to expect. This time, I chose the star cluster M5, which is quite bright an was not too hard to see in the scope. Sure, it does not hold to a darker spot away from light polluted city skies. But hey, there is still a lot to see:

Image properties: 75x 40s, 800mm f/4, Sony A99ii @ ISO 1600

A small telescope meeting

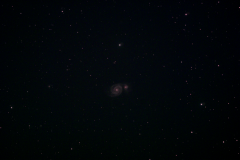
After the completely washed away telescope meeting in the beginning of May, I tried to meet up with a few enthusiasts with quite promising weather prospects. Unfortunately the cloud cover did not vanish all the way. Even though there was quite a lot of clouds passing over, I could manage to snap some light frames from M51 – the Whirlpool Galaxy.

Image properties: 16x 180s, 714mm f/7, Alpha 6000 modified

It was fun chatting and also delicious being hosted with creole food 🙂 which compensates for almost any cloudy night!

Dark Sky Logger – my extended DIY Sky Quality Meter

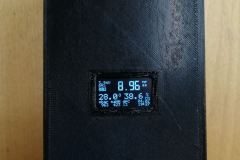
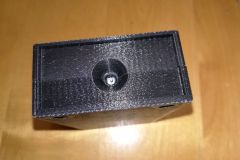
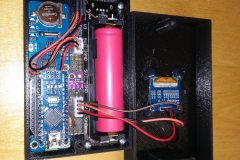
A few weeks back I had the DIY Sky Quality Meter demo setup working (see here). My primary target in building a Sky Quality Meter was to have a complete all-in-one ambient conditions logging device. So to finalize this project, I added a micro SD-Card reader, real-time clock, barometric pressure sensor and a rechargeable battery. I could manage to squeeze all the code into an Arduino nano :-). With the small footprint of the Arduino nano, I could build a case box (3D-printed) with only 123x68x34mm external dimensions.

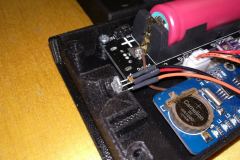
One essential part of the case is a chamber for the TAOS TSL237S sensor. The status LEDs of the Arduino did alter darkness readings severely. So any light apart from the night sky has to be shielded from the sensor!
Furthermore, the sensor requires a IR-block and color correction filter, to work comparable to the Unihedron Sky Quality Meter. As described here, Unihedron uses a HOYA CM-500 filter. I could find an almost identical filter, which is now included in the case as front cover of the sensor chamber.

My Arduino code may lack some fine tuning (forgive me, but I will not publish my source code. It would not be fair to Unihedron, who had all the development to build the original SQM device!). But the sensor readings are comparable to the second fraction digit in most cases to the SQM unit I could use for testing. This is sufficiently precise to me. I do refresh all the values (darkness, sensor frequency reading, temperature, humidity, pressure, dew point, calculated altitude, battery voltage, presence of SD card as well as time and date) every 5 seconds. This is someway insane, as a refresh rate of 30 to 60 seconds would still be very high 😉

With a freshly charged 18650 battery, my device may record for more than 50 hours. So even a weekend trip would be no issue.

For all curious folks out there, this is the parts list:
– Arduino nano v3
– DS1307 RTC module
– BME280 – temperature, humidity and pressure module
– Micro-SD Card interface
– 1.3″ OLED Display (128×64 Pixel)
– 18650 Lithium battery carrier with charger and 5V output
– TAOS TSL237S sensor
– 8mm UV-IR Cut filter
– 3D printed case

And this is the device:
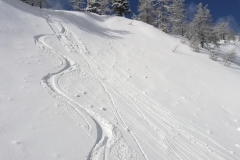
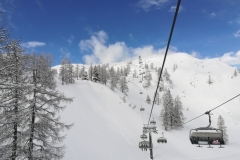
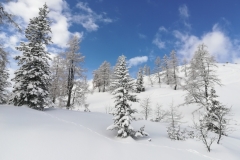
What a day at Tauplitz ski resort

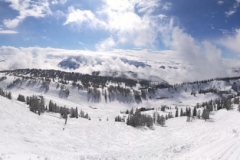
Today I had the chance to go to Tauplitz ski resort. The weather forecast predicted for a quite instable day, including rain. The morning rain at Tauplitz was actually snow fall creating pristine conditions . Further more, the clouds opened up and did give way for a wonderful day up in the mountains. In the surrounding areas and from the late afternoon on (on the way home) there was still rain and a lot of cloud coverage. But that did not matter at all.

This is central Austria in best winter / skiing conditions:

My DIY Sky Quality Meter – first test

A few times in the past I have seen charts of the dark sky quality for astronomical use. Especially during a visit of the University astronomy department I had the chance to talk with one of the facilities operators. This made me curious about how they quantify the night sky quality.

Upon further research I found the widely used Sky Quality Meter by Unihedron. It is a small box measuring the sky brightness by means of a light sensor with corresponding frequency output. When I could find a distributor selling these sensors for a good price, I was up to building my own one.
My concept was to use a arduino style micro controller and build a sky quality meter together with weather data (temperature, pressure, humidity) recording device. The device should save every 10-30 seconds the data collected. And it should last for at least one whole night running on a small(er) battery like AA or 18650 lithium type.

The hardware part was quite easy to accomplish. I simply had to connect a couple of wires from the micro controller to the sensors and other components. The harder part was to create a proper software, fulfilling all my needs. I had to find a way to
1) cope with the frequency range of 0.01Hz to 1MHz
2) fit all the code within the small memory
3) calculate sky quality and calibrate device to a reference device

Luckily, apart from a reasonably well described device on the Unihedron web-site, I could borrow one Sky Quality Meter from a fellow astronomy club member. So I had a reference device to compare and calibrate my device.

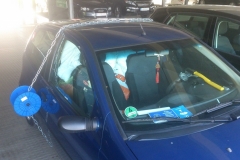
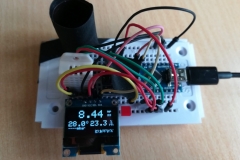
Here is the test setup. The readings are already very close to the original device!

Comet C/2018 Y1 Iwamoto with NGC 2903 Galaxy from the city

It is always frustrating to see good weather pass without the opportunity to do some photography – especially astro-photography. So even if time does not permit a trip to the darker spots in reasonable distance from my home, it is worth a try to setup the telescope on the balcony.

This time, clouds cleared throughout the day (and happend to reappear before midnight). So I had to take the chance to spot Comet C/2018 Y1 Iwamoto. Unfortunately, I was unable to spot the comet through the eyepiece. The sky was far too bright (approximately 18mpss) watching straight over the citys light dome and having a 60% illuminated moon shining bright. Fortunately, through the camera I could make out a smudge, being brighter than the sky.

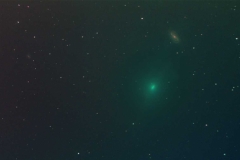
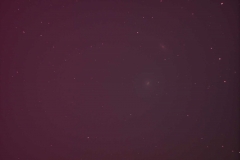
Processing the 180s subs with 1 hour total exposure time, I could achieve this result (compare to the unprocessed image!):

Image is a composite of 2 stacks (one aligned on stars, second aligned on comet). The comet moved more than 1.5 degrees during the 1 hour capturing time!
Above the comet: NGC 2903 (mag 9 galaxy)
At left: NGC 2916 (mag 12.1 galaxy)

Imaging setup: 800mm f/4.0 Newton, Sony A6000 full spectrum modified, UV/IR block filter, UHC filter, coma corrector (at wrong distance).
20x 180s @ ISO800, darks and flats
Conditions: +2°C, 60% moon, 18-18.5mpss sky in suburban location (with ample street light)

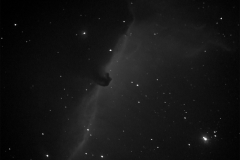
Horsehead Nebula in H-alpha across the city

I had a bit of time to experiment with an H-alpha filter at home. Conditions are limiting astro-imaging as my balcony faces south. Living in the northern outskirts of a city, all the sky visible is significantly affected by city lights. This night, the sky was somewhat OK, reaching up to 18.7 to 19.5 mag/arcsec².

Using narrow band filters, like an H-alpha filter, the majority of the city lights may be cut away. This image (not perfectly focussed) shows, what is possible. It is a result of 12x240s, captured at ISO800 with my modified Sony A6000…

Sunset in Graz, Austria

Graz is a town, having still a city center with a lot of its original medieval flair. One of the best places to watch a sunset is on top of Schlossberg. There you may find Uhrturm (the clock tower). This landmark may be seen from most parts of the town. This is how it looks like:

Comets during full moon

After 2 weeks of thick cloud coverage, I had the chance to spend the evening at the observatory. Actually I jumped in to hold the guided tour this evening…
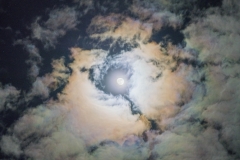
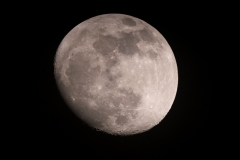
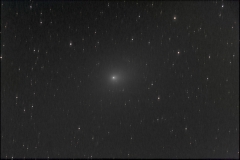
As there was almost full moon and some cloud coverage (which got steadily thinner) I played a bit around with the setup. I thought – deep sky at full moon is a waste of time. But how about the comets 46/P Wirtanen and 38/P Stephan-Oterma? How brigth are the comets still? Would they shine through the moon lit sky?
Well… I could not make out Stephen-Oterma. But Wirtanen was barely (in)visible. I had some other tasks to do, so I attached the camera to the scope and let it run to see, what may be gathered under these conditions.
Despite of the Moon and the corona of Moon, a little bit of the comets was still possible to process from 90 minutes of total exposure time each:

This site uses cookies. By continuing to use the site (including navigation and scrolling), you agree to the use of cookies. more information

The cookie settings on this website are set to "allow cookies" to give you the best browsing experience possible. If you continue to use this website without changing your cookie settings or you click "Accept" below then you are consenting to this.

Close