SkyWatcher pier extension- a major design flaw?

I like to observe or image through my 10 inch Newtonian and 102mm APO telescopes. Both have quite long tubes. When slewing to high altitude objects, you risk to collide with the tripod legs. There is only one way to avoid such situations. You have to raise the mount head from the tripod by means of pier extensions. When ordering an off-the-shelf pier extension, one would assume, it would be designed properly and provide a solid construction. With the SkyWatcher pier extension I was proven wrong – unfortunately. Here is why:

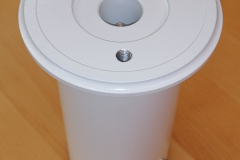
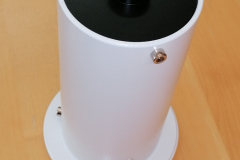
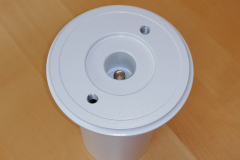
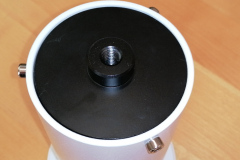
A few days ago I received the SkyWatcher pier extension I intended to use with my AZ-EQ6 mount. The pier extension basically consists of 3 parts:
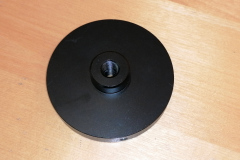
– A black base plate, connecting to the tripod
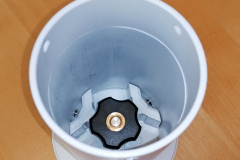
– A “pipe” like part with white finish
– A top mounting plate, where your mount will be attached.
To attach the pier extension, one has to remove the Azimuth bolt from the tripod first. The Azimuth bolt has to be attached to the top mounting plate for fine adjusting the mount head.
Next, one has to unscrew the 3 locking screws of the black or white base plate. Either one is OK, but with the white top plate it is easier to place the mount on top. The top mounting plate includes the M10 threaded rod with knurled wheel to attach the mount to. You have to securely tighten the M10 bolt to the mount, as you will not be able to tighten it more, once it is all set up. Finally, you place the mount head on top of the base plate / base plate plus extension (if you unscrewed the top plate alone) and add and tighten the locking screws.

Now that the mount is set up, you will soon discover the design flaws I refer to:

  1. pier extension is not stiff enough
    As the pier extension consists of 3 parts, which are held in place by M4 screws, you don’t get a solid built like when the parts would have been welded together. As I have seen with other comparable products, an opening to one side would have provided access to the M10 bolt with a rock solid quality.
    A combination of AZ-EQ6 and 10 inch Newtonian is far too much! A small(er) scope and mount might be OK though.
  2. No Azimuth locking bolt on the base plate
    This is a show-stopper to me! The whole setup from the tripot up to the scope turns on the slightes touch to the telescope! Any polar alignment will be lost upon changing eyepieces or the like!

I considered, drilling a hole to the base plate to add an azimuth bolt. Though as the whole thing was not stiff enough, I returned the pier extension (thank you Teleskop-Express for accepting a no questions return!).
If SkyWatcher would re-design this pier extension or release one with significantly improved design, I would immediately buy one. But up to this point, I have to avoid high altitude objects (or use a smaller telescope)…
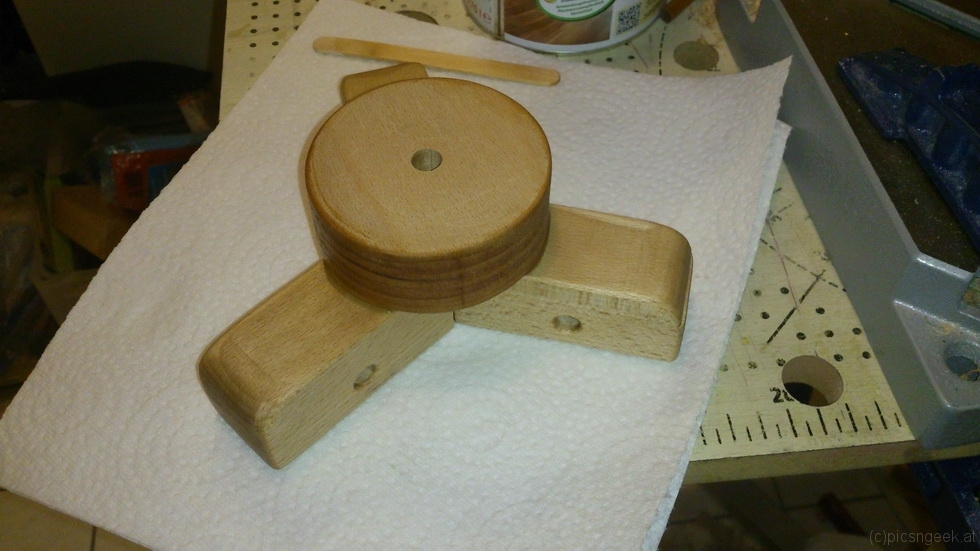
Wooden tripod base for small telesope mounts

DSC_0456

Picture 1 of 5

Several years ago I purchased my first telescope. The telescope had an EQ2 mount included. The EQ2 is an entry level mount, with an all in one mount and tripod base. The EQ2 served me for some time, until I got frustrated with the instability and bad and worn gears in my unit. So one day I replaced it with a goto mount. The last time I used it was for the 2006 solar eclipse in Turkey. Since then the whole thing had to sit and wait for a long time in the basement.
Several years passed until I added a Sky-Watcher Star Adventurer to my collection of gear (I am really happy with this little travel mount!). To use the Star Adventurer in its full extent, a sturdy tripod is required.
None of my photo tripods (neither aluminium nor carbon fiber) could provide a rigid platform to hold against the vibrations of wind or camera mirror flip. After reading several comments on tripods for the Star Adventurer, the direction was obvious to use a wooden tripod. I was already scanning the market for proper tripods, when I remembered the EQ2, which had quite a nice wooden tripod. The only problem to solve was, to replace the EQ2 head with a flat base. The base should provide a stable means to attach the Star Adventurer with one UNC 3/8 screw…

The design was straight forward: The construction exists of 2 parts. A 3-prongue base to attach to the tripod legs and a raised platform for the Star Adventurer. As I didn’t have a large enough piece of beech wood for the base, I used a 40mmx40mm beech wood block. The block was cut in 3 equal parts. These are mitered at 60°. On the other side, I rounded the top part (a rather aestetical finish) and drilled the hole for the bolt attaching the tripod leg.
The platform consists of one round disc of 40mm thick beech wood, which I cut out with a 100mm circular drill. The 4 parts were then glued together with 2 wooden pins joining each leg part, to enhance mechanical strength.
After drilling the required hole for the UNC 3/8 screw and the recessed hole for the screw head with washer, the whole part was sanded, cleaned and finished with hard oil. The platform top face received a rubber coating for a better hold of the Star Adventurer.

Parts used:
3x 40x40x100mm beech wood
1x 100x100x40mm beech wood (for platform)
6x 6mm wooden dowel

This site uses cookies. By continuing to use the site (including navigation and scrolling), you agree to the use of cookies. more information

The cookie settings on this website are set to "allow cookies" to give you the best browsing experience possible. If you continue to use this website without changing your cookie settings or you click "Accept" below then you are consenting to this.

Close